Category: Without special vegan ingrediencts

Recipes without special vegan ingredients. This means that these recipes do not require anything special. But also no products that are difficult to get. Such as vital wheat gluten, silken tofu or special binding agents.

You can get the ingredients for these recipes in any small supermarket.

Vegan recipes? Check out Daily Vegan!

  • Krupuk – Vegan Prawn Crackers – Ready in 5 Minutes!

    Krupuk – Vegan Prawn Crackers – Ready in 5 Minutes!

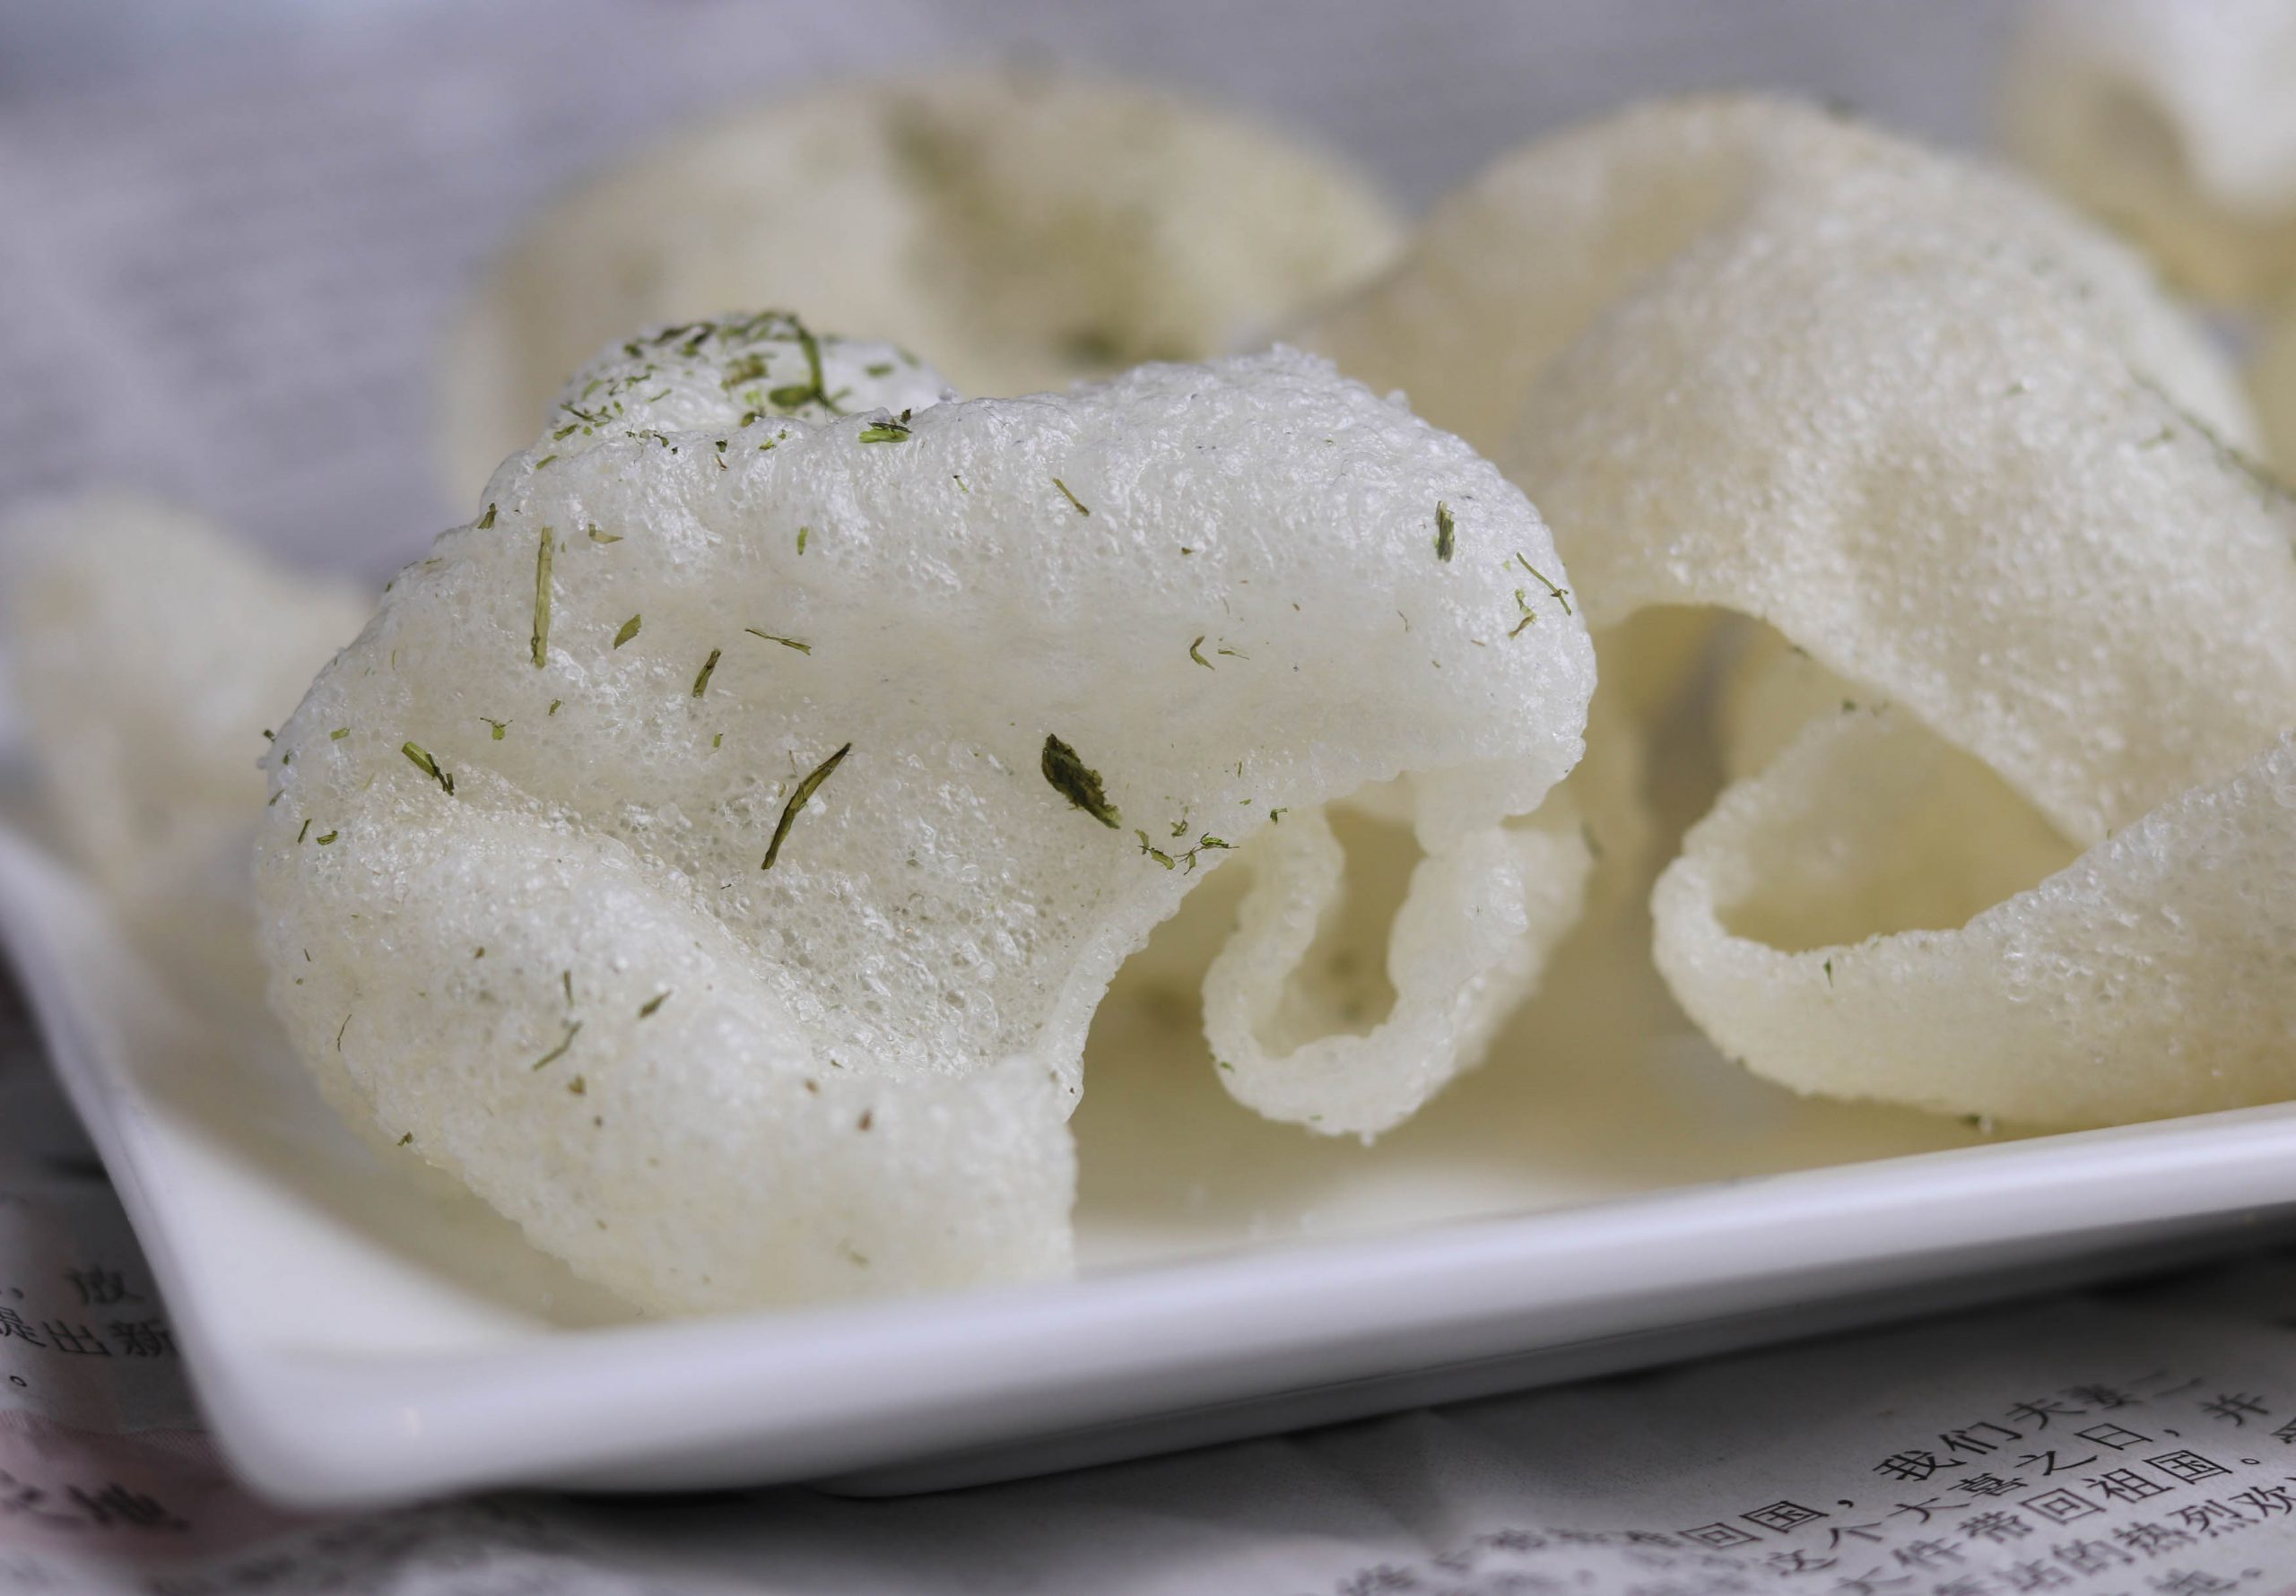
    Vegan krupuk, prawn chips, prawn crackers, prawn crisps, shrimp chips, shrimp crackers, however you might call them at home, this a very quick and easy recipe to make the delicious snack at home. And 100% plant based! Ready in under 5 minutes and fully vegan!

    The other day, while deep-frying glass noodles, I thought that krupuk is quite similar, just made from slightly thick rice paper slices. Of course, I had to try that out immediately! And it worked perfectly!
    Seasoned with nori and salt, my vegan crab chips get the perfect ocean taste.
    So easy that I can hardly call it a recipe!

    And now have fun popping up rice paper into shrimp chips. And enjoy the crunch!

    This recipe is also available as a video on my YouTube channel. Please follow me there!

    Here are some pics of my vegan prawn crackers:

    [modula id=”38856″]

    Ingredients for 1 large serving of krupuk:

    10 pieces, approx. 5 cm in size, thick rice paper (You can find it as “Rice flakes” in Asian markets)
    300 ml of vegetable oil, sunflower oil, rapeseed oil or coconut oil
    1/2 teaspoon salt
    1 teaspoon nori algae powder (or very fine flakes, are available in the Asian market. You can also shred a nori sheet for sushi in the food processor.)

    Preparation:

    Heat the oil in a small saucepan or in a very small pan.
    Briefly add 2 to 3 pieces of rice flakes. Fry until they have puffed up and became airy and crispy.

    Take out the krupuk with a slotted spoon and place it on kitchen paper to drain. Maybe also use some kitchen paper to pad off some leftover oil.
    Repeat this with the other pieces of rice flakes.

    Sprinkle the salt and the nori flakes on the fresh and still warm, vegan shrimp chips.

    That’s it! Easy, right?

    Enjoy your snack!

    Tip:

    Of course, you can also season the krupuk completely differently to suit your taste. For example, they also taste delicious with chili powder, ground, dried ginger, various spice mixtures or lemongrass.

    Are you hungry for more vegan seafood recipes?

    Also try my completely plant based ceviche, calamari or anchovies.
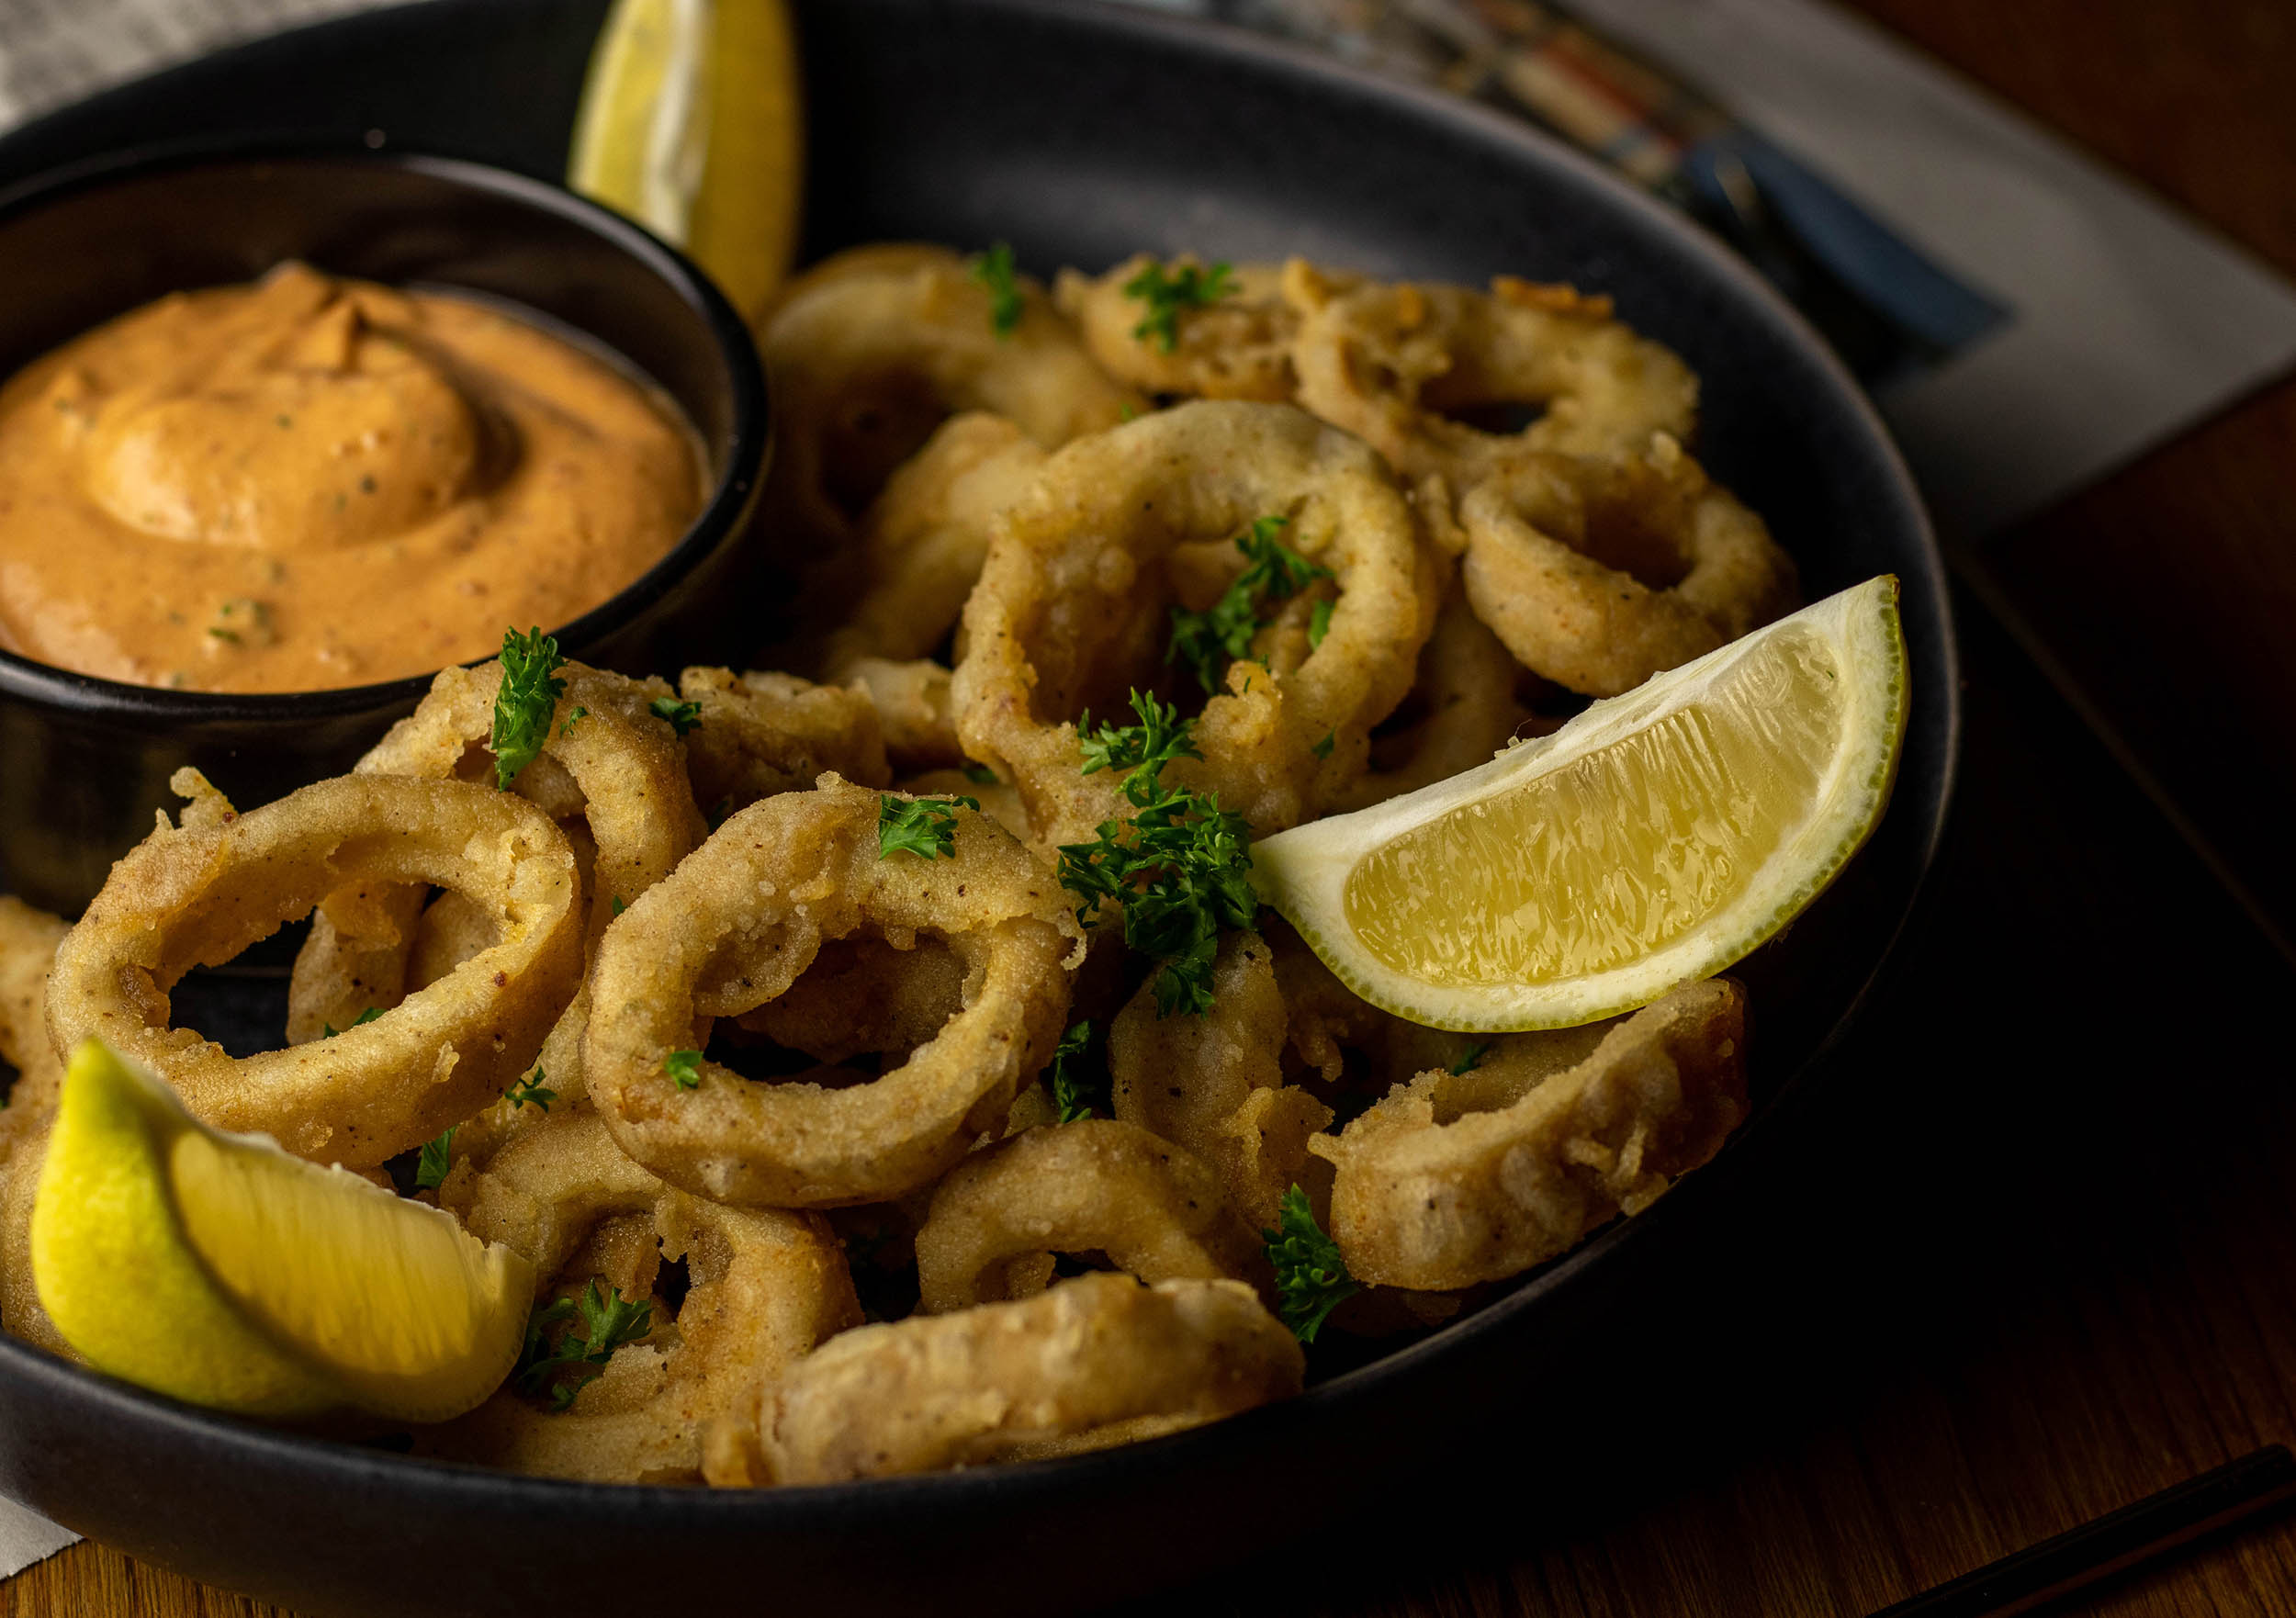
  • Vegan calamari – with spicy chipotle aioli

    Vegan calamari – with spicy chipotle aioli

    A little culinary trip to long gone summer holiday memories. With my vegan calamari. Made from regional, seasonal king oyster mushrooms! And entirely plant based.
    Battered and fried, accompanied by a nice and spicy chipotle aioli.

    Besides of the slightly fiery and spicy chipotle aioli dip, I also recommend lemon wedges. It adds a great taste, to drizzle the vegan squid with a little lemon juice.

    The perfect finger food!

    So? How many kilos of vegan calamari have you already eaten?
    I prefer not to answer that!

    [modula id=”36904″]

    Ingredients for 2 servings of calamari:

    Squid:

    4 large, thick king oyster mushrooms
    3 tsp of wakame sea weed, dried
    3 tsp of nori flakes

    250 ml soy milk
    1 tbsp apple cider vinegar

    Batter:

    200 g flour
    1/2 tsp smoked paprika, ground
    1/4 tsp garlic powder
    1/2 tsp pepper, black, ground
    2 tsp of salt

    Approx. 0.5 l vegetable oil, sunflower oil or rapeseed oil

    1 tbsp parsley, chopped
    1/2 lemon, cut into wedges

    Chipotle Aioli:

    200 ml vegan aioli (homemade or bought)
    1 chipotle, pickled in Adobo sauce, chopped
    1 tbsp parsley, finely chopped

    Preparation:

    Vegan calamari:

    Cut the king oyster mushrooms into round slices about 1/2 centimetre thick. Cut these slices into rings with a round cookie cutter. These rings should also be about half a centimetre thick. This works best if you use round cutters in different sizes.

    I usually keep the remaining round mushroom pieces and the mushroom hats in the refrigerator until the next day. Then I just fry them as a side dish or I fry them with onions and scrambled tofu for breakfast. They also taste very good in a creamy sauce.

    For making calamari, add about one litre of water to a sauce pan. Add both types of seaweed and bring to a boil.
    Let the mushroom rings simmer in that broth for about 10 minutes. Take the sauce pan off the stove and let the vegan squid cool down in the hot seaweed liquid for 20 minutes. Sieve and remove the algae from the mushrooms.

    Pour the apple cider vinegar into the soy milk, do not stir in, but let it sit for a few minutes. Until the vegan milk gets a little flaky.

    Mix the flour with the smoked paprika powder, garlic powder, salt and pepper.

    Stir through the soy milk and add all mushroom rings to it. keep the vegan calamari rings in the soy milk for about 15 minutes.
    Then take them out, one by one and batter them with the flour mixture.

    Finally, heat about half a liter oil in a saucepan to around 170 ° C. Fry the battered calamari in the oil.

    Chipotle Aioli:

    Puree the chipotle with the vegan aioli. Then just stir in the chopped parsley.

    Put the freshly fried, hot vegan calamari on 2 plates, then sprinkle with a little parsley and serve with the chiptle aioli and a few lemon wedges.

    Enjoy your meal!

  • Fermented garlic – spicy, perfect for refining many dishes

    Fermented garlic – spicy, perfect for refining many dishes

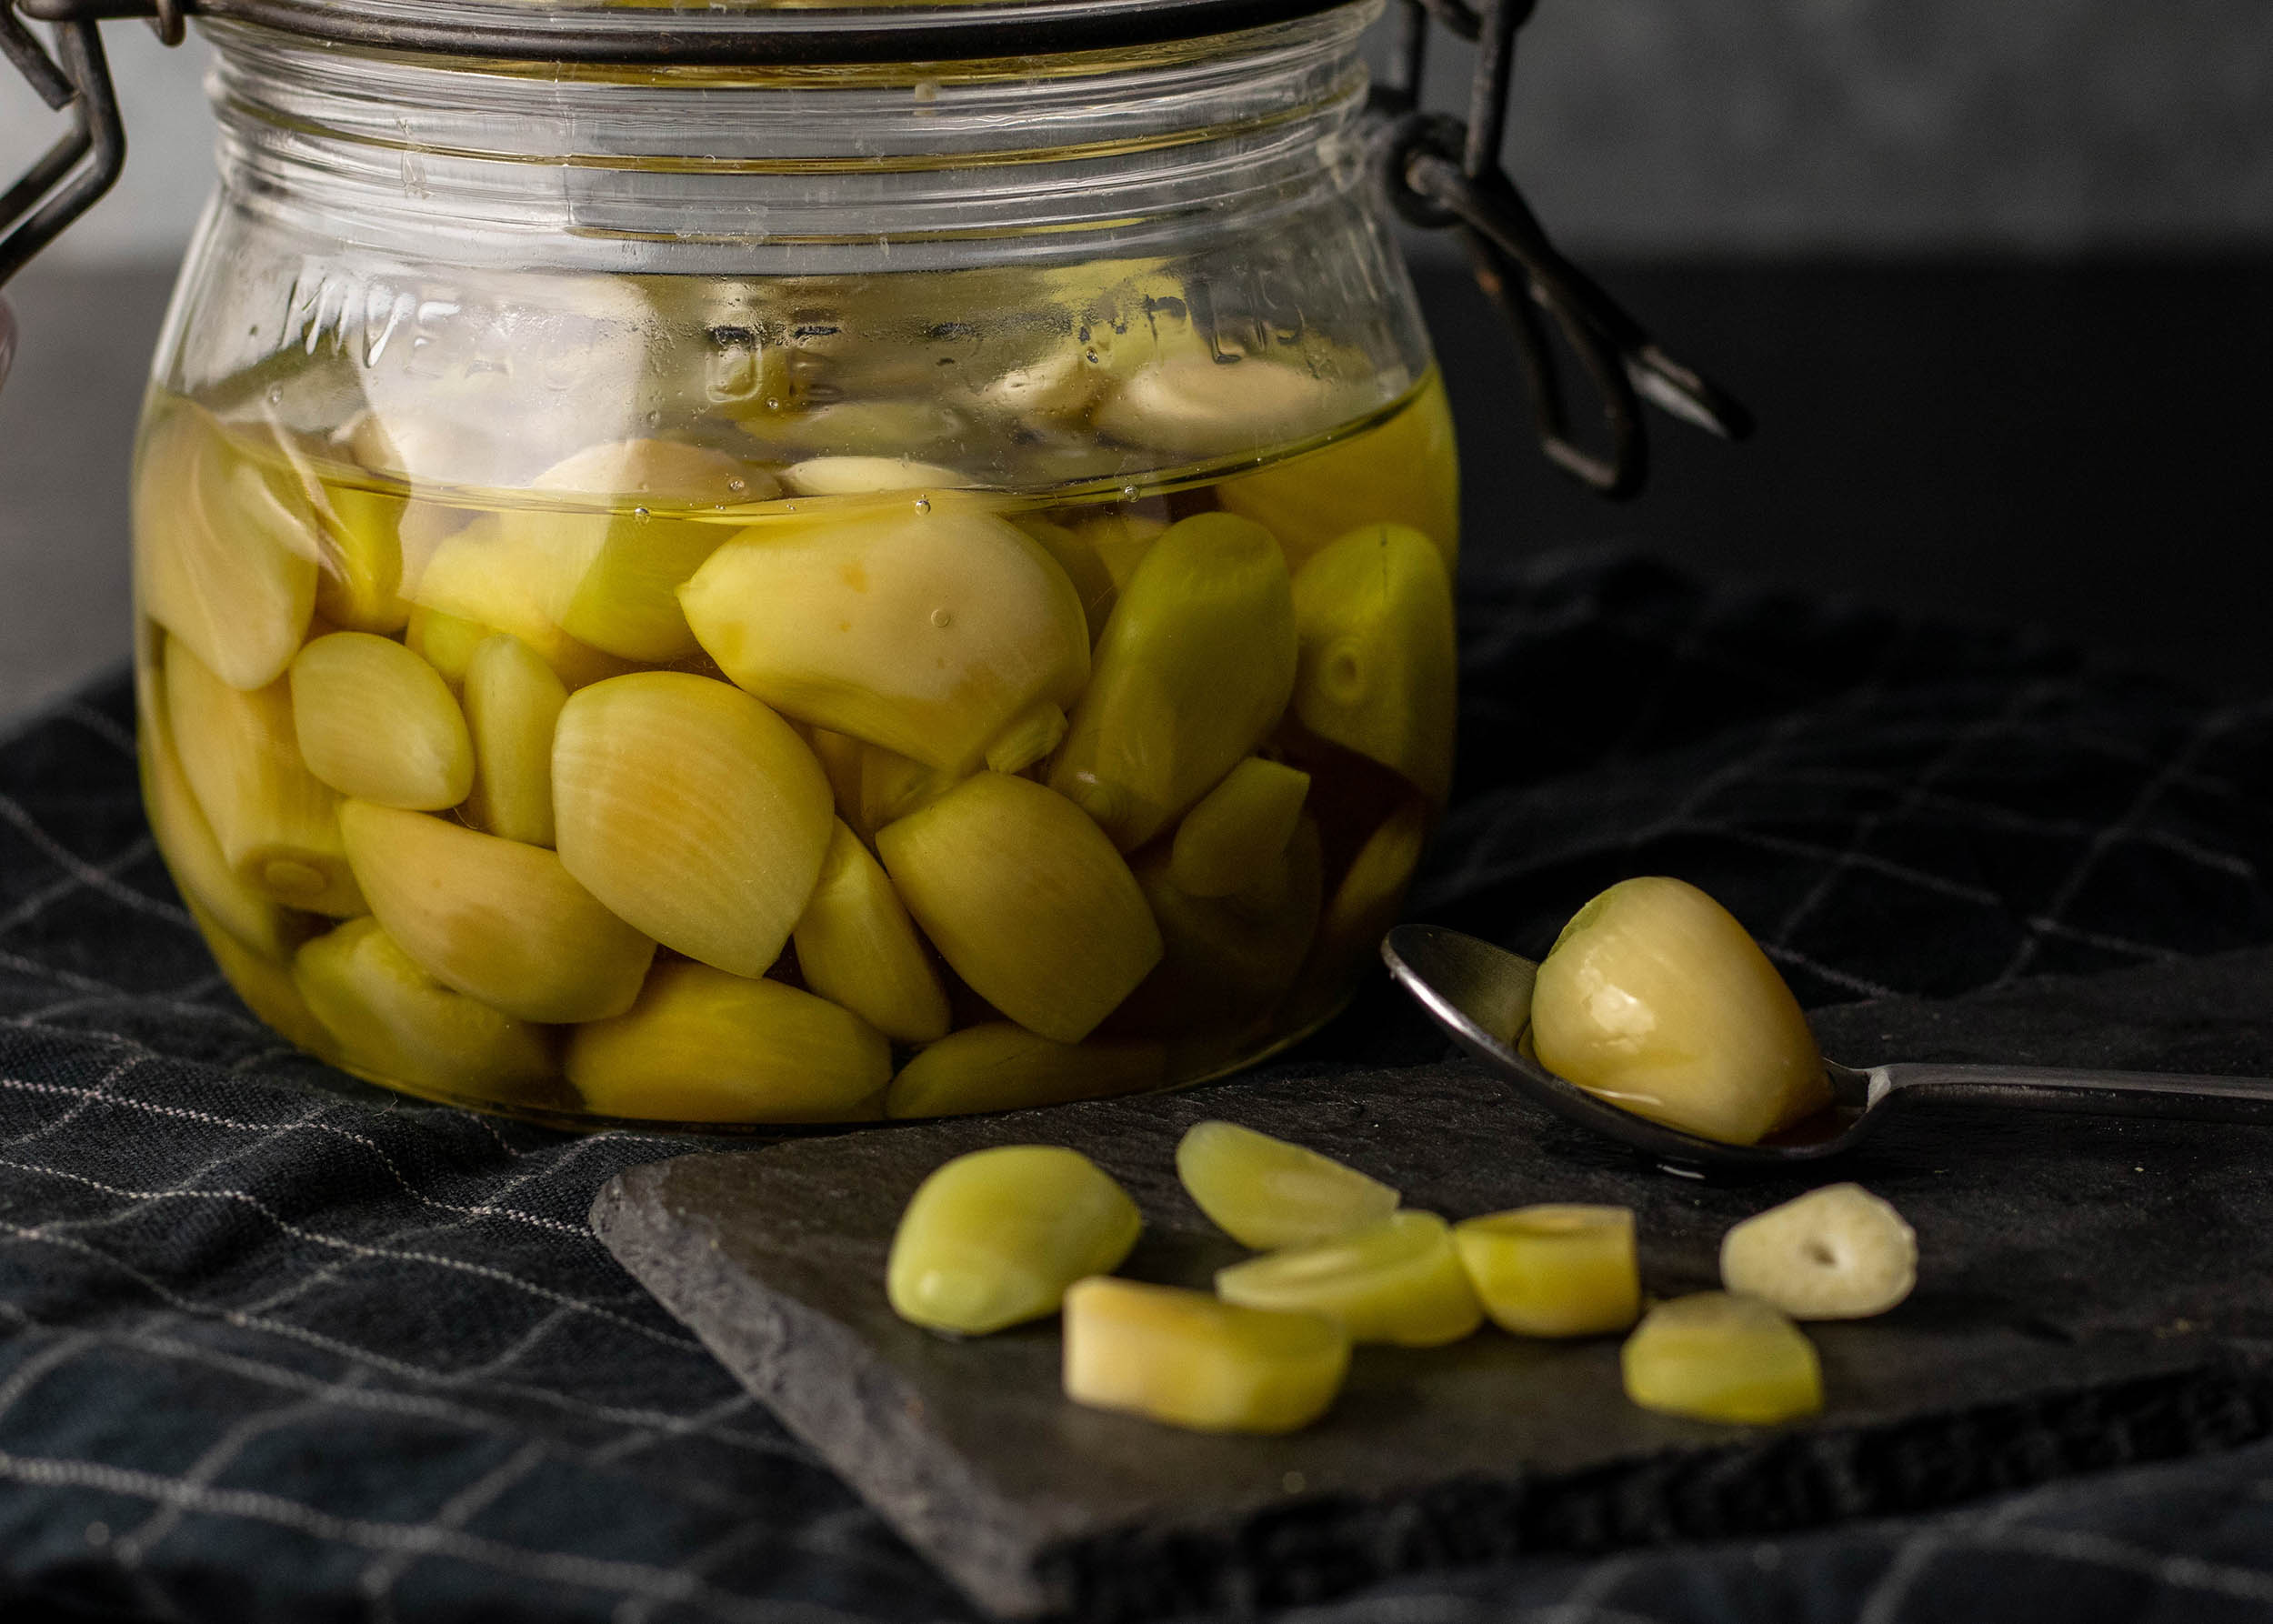
    Insanely intense with an incredibly exciting taste! My fermented garlic refines every risotto for me, but also stir-fries, dips and dressings, as well as homemade vegan cheeses.

    Hearty garlic, combined with the lactic acid created by fermentation. Intense, aromatic, slightly spicy.

    Lactic acid fermented garlic refines many dishes in a new, delicious way. And it is very easy to make!

    [modula id=”35954″]

    Ingredients for 1 jar of fermented garlic:

    5 garlic bulbs, organic
    Kosher salt

    Preparation:

    Open the garlic bulbs and peel the cloves.

    Place a small jar or a screw-top jar with a capacity of approx. 0.7 l on a kitchen scale. Set the kitchen scale to 0.

    Add the garlic cloves. Try to place the garlic as close as possible and with little free space in between.
    Pour water into the glass so that the garlic is well covered. Ideally, there is now a few centimeters of space left in the glass.

    Most times I ferment vegetables with 4% salt. I thin that tastes just right, not too salty, but not bland either. And there is enough salt in the jar to protectthe vegetables against unwanted bacteria.

    So if you have 400 g of garlic and add 500 g of water to it, you get 900 g. 4% of that are 36. So you need 36 g of salt.

    For example, I had the following amounts:
    307 g garlic + 210 g water = 517 g, of which 4% makes 21 g salt

    Now pour the water out of the jar into a clean bowl. Mix it with the calculated amount of salt until it is fully dissolved.
    Then pour the salt water back into the jar.

    Now you have to make sure that the garlic is always covered by the salt water so that no mold can form. If, contrary to expectations, mold does develop, the entire ferment must be disposed of!
    To prevent this from happening, I put a little weight on the garlic so it cannot come up to the surface. In this case, I simply filled a little zip lock or other bag with a little water. I closed the bag and placed it on the garlic.

    The jar should not be fully open, but gas must be able to escape. This works fine with the plastic bag method. But you can also take a thoroughly cleaned stone, place it on the vegetables and then only loosely seal the jar.

    In order for the lactofermentation to be successful, the garlic must ferment in its liquid for about 7 days. When the environment has a room temperature from 21-23°C (70-74°F). The duration of the fermentation depends on your taste and the romm temerature. The longer the garlic ferments, the more intense it becomes. I think mine is optimal after 7 days at around 21°C.

    After filling, place the fermentation vessel in a bowl or a deep plate. The jar may overflow a bit, when the fermentation process becomes very active.

    After 3-4 days, start tasting the garlic once or twice per day. As soon as it has achieved the optimal taste, close the jar tightly and store in the refrigerator.
    The fermented garlic lasts there for a few weeks to months.

    Enjoy your fermented garlic!

  • Gourmet garlic mushrooms from the oven

    Gourmet garlic mushrooms from the oven

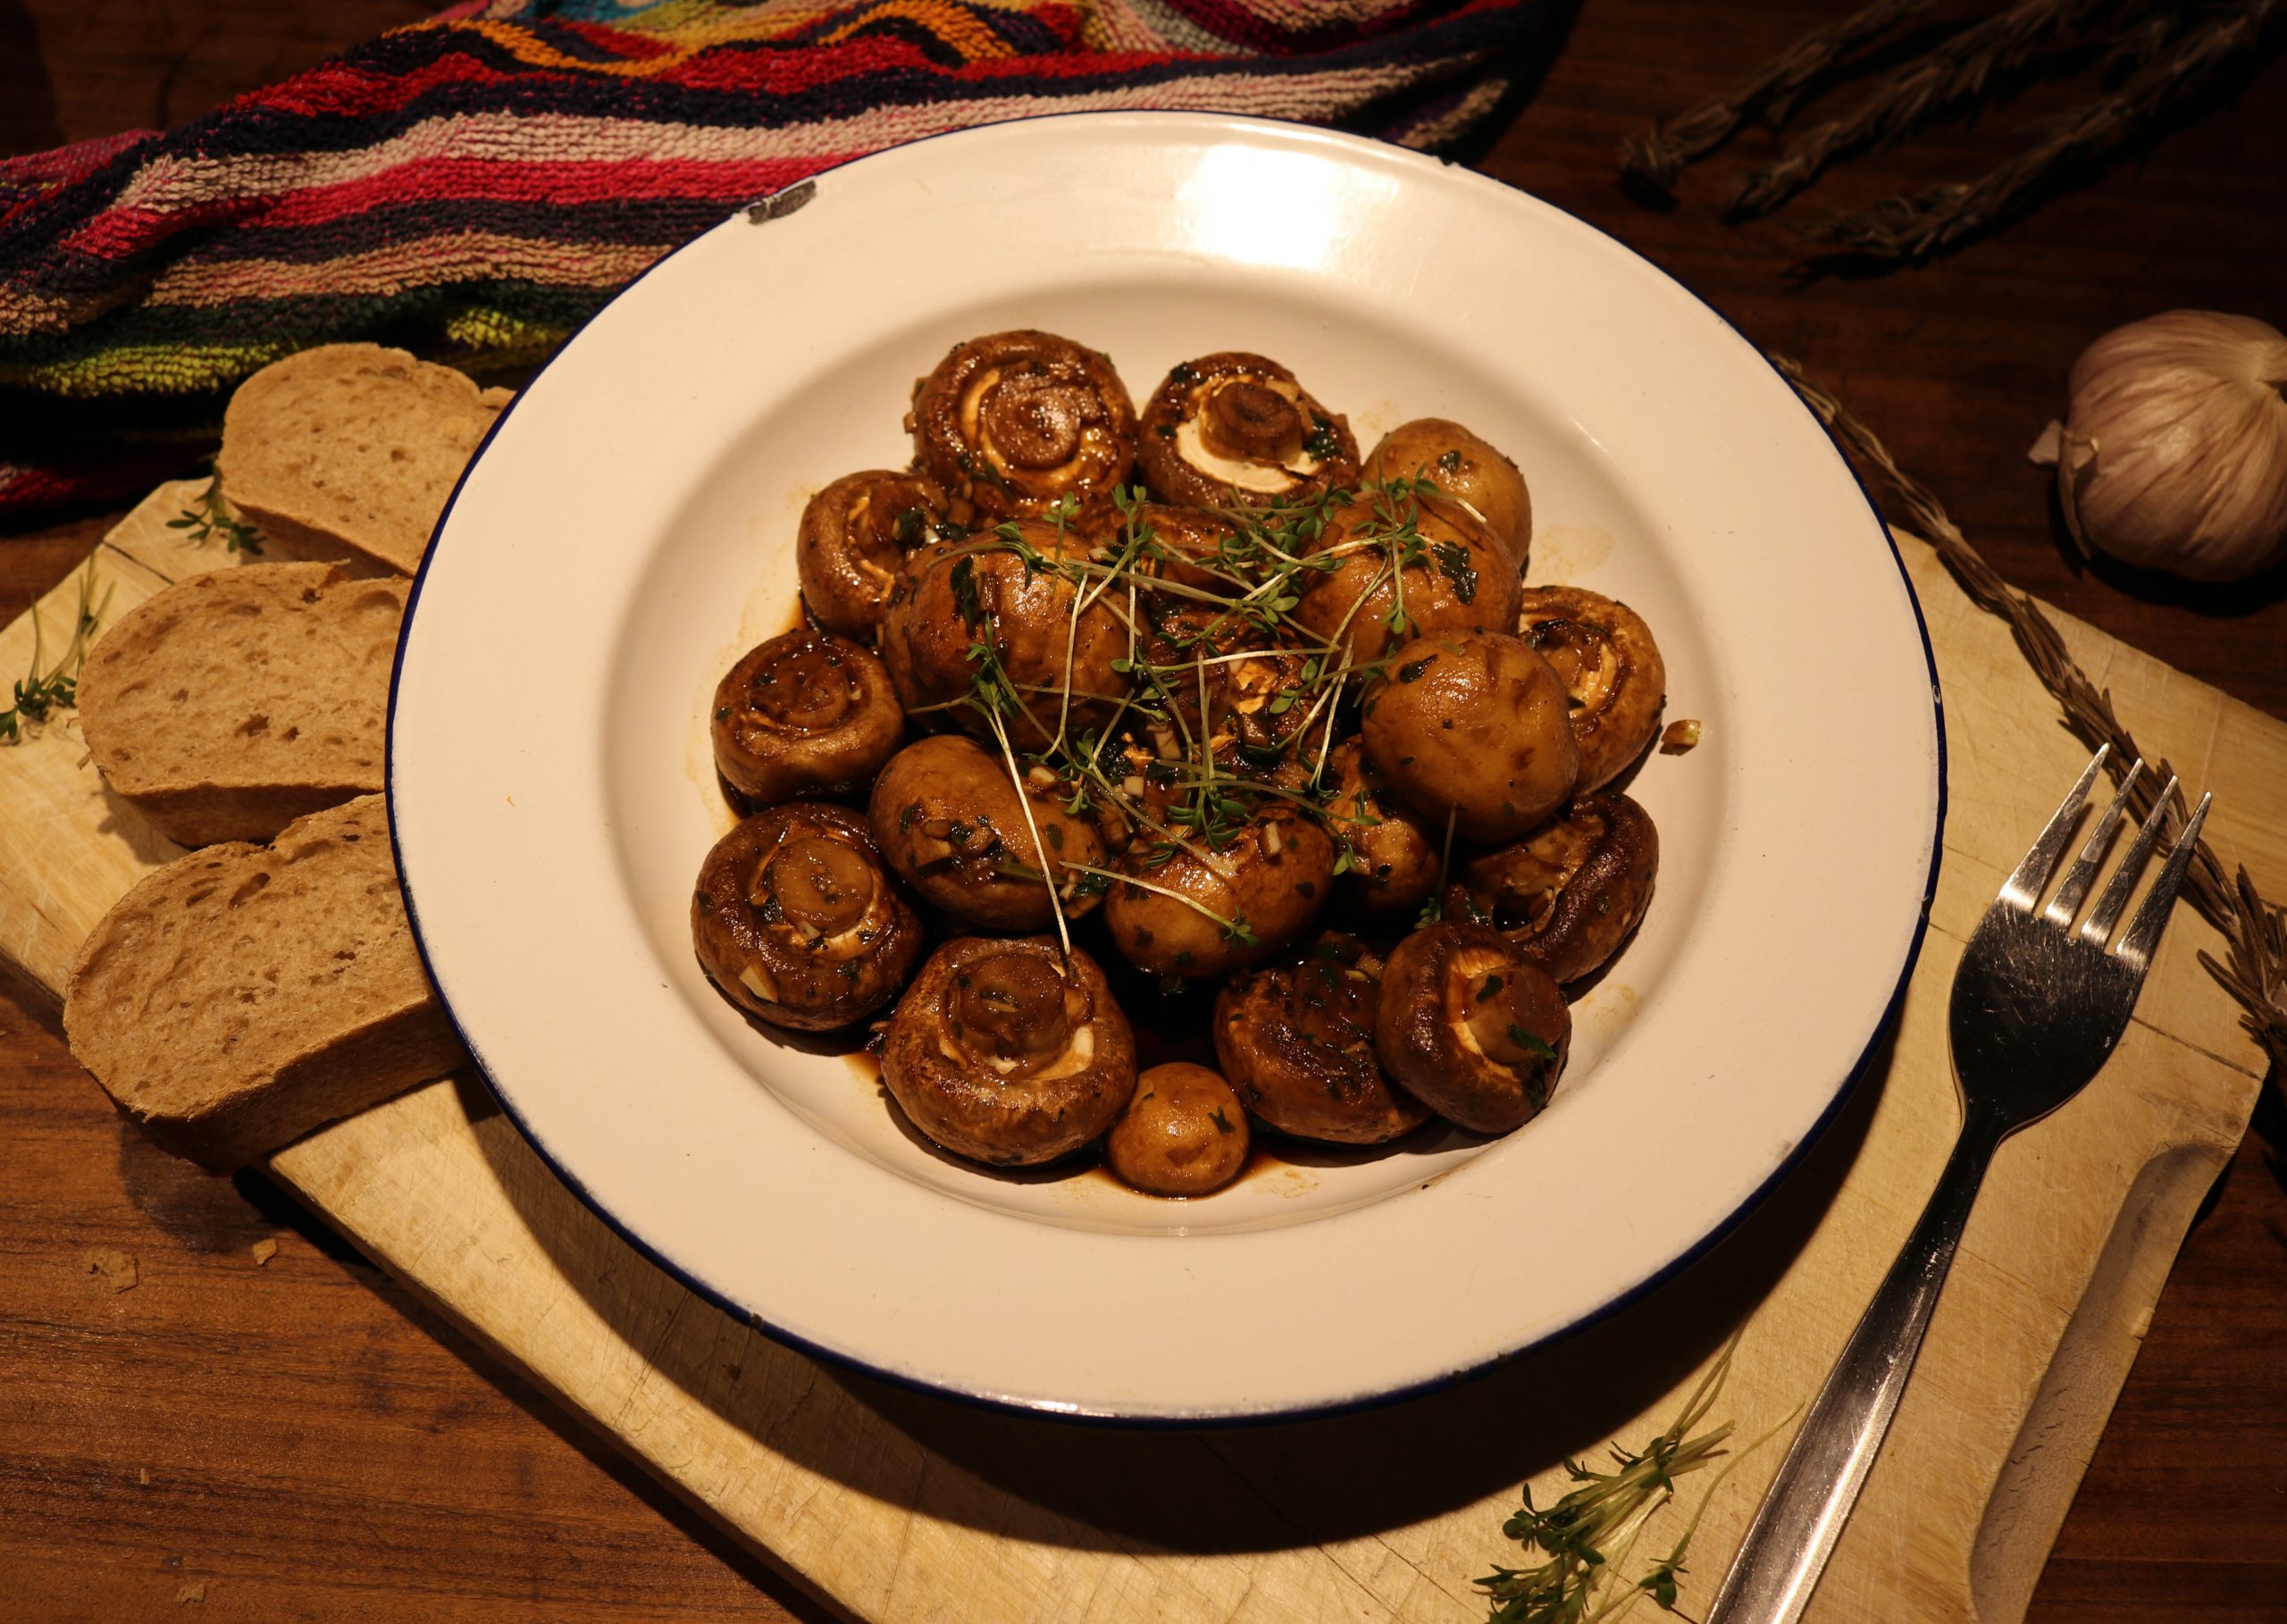
    Here is my recipe for gourmet garlic mushrooms from the oven. It’s so easy to make from the simplest ingredients, that everybody has on their kitchen shelf. All you need to get from the store are fresh mushrooms. And basically all you need for the preparation is an oven an a simple casserole dish. Absolutely tasty and fun to make!

    I roast the mushrooms in a sour and spicy garlic marinade with herbs until they are soft and baked. That is how the become a a very special, spicy taste experience. Prepared quickly and easily!
    A great side dish for seitan dishes! But also an awesome snack when the mushroom hunger gets to you!

    [modula id=”34173″]

    Ingredients for 4 servings of garlic mushrooms:

    1 kg (6 cups) rather small mushrooms, cleaned
    1 tbsp oil (vegetable oil, rapeseed oil or sunflower oil)
    3 tbsp dark balsamic vinegar (Aceto Balsamico)
    2 tbsp soy sauce
    3 cloves of garlic, very finely cut
    1/2 tsp thyme, chopped, dried
    1/2 tsp paprika powder
    1/4 tsp salt
    1/4 tsp pepper

    Optional: fresh herbs such as parsley, chives, dill or basil for sprinkling

    Preparation:

    Preheat the oven to 200 °C (390°F) top and bottom heat.

    Mix the tablespoon of oil thoroughly with the balsamic vinegar, garlic, thyme, paprika powder, salt and pepper.
    Put the mushrooms into the marinade and turn them over, until they are fully covered. Place them in a large casserole dish or lasagna dish. The marinated mushrooms should be sitting close to each other, but not on top of each other.
    Roast in the oven, for about 25 minutes. Turn the mushrooms once after 10 minutes.

    Enjoy your meal!

    Do you fancy more hearty recipes?

    Also try my Crispy vegan chicken drumsticks on veggies, Cauliflower or broccoli baked in herbal dough on red wine shallots, Meatball sandwich, with homemade subway bread or Thüringer Brat – the best German sausage!

  • Vegan anchovies, perfect for seasoning or as a side dish

    Vegan anchovies, perfect for seasoning or as a side dish

    Anchovies, ideal to add full flavoured umami to many dishes. Here is my vegan version, made from eggplants. Delicious and free of animal suffering.
    My vegan anchovies are not only perfect for seasoning or as a side dish, they also taste fantastic on a pizza or variations of bruschetta.

    This time I made the vegan anchovies mainly because I had some cravings for Cesar salad. And the original Cesar dressing’s taste relies on the umami taste of the anchovies it contains. With my anchovies it turns out just brilliant!

    If you enjoy vegan fish recipes, you might also like to try my fish fingers or salmon spinach roll. Or just browse through my ‘V fish‘ category here on dailyvegan.de.

    [modula id=”29795″]

    Ingredients for a small glass of anchovies:

    1 eggplant (medium size)

    250 ml apple cider vinegar
    250 ml water

    salt

    120 ml of olive oil
    1 tsp. Wakame algae, dried (you can buy it at Asian supermarkets)
    1 tsp. Nori flakes (Asian market)
    1 clove of garlic, finely chopped

    Preparation:

    Remove the peel from the eggplant using a peeler. Continue peeling it with the peeler so that you get thin strips of eggplant meat. The center of the eggplant is too dry sometimes, but the outer part is sufficient.

    Salt the eggplant strips generously and place them in a bowl. Let them rest for at least 4 hours or overnight. Then squeeze out the water gently.
    Whisk olive oil with wakame, nori and garlic.
    Bring the apple cider vinegar and water to a boil. Blanch the eggplant strips in the boilng vinegar-water for 2 minutes. Then pour off the liquid thoroughly.

    Now put the eggplant strips in the seasoned olive oil. Let the anchovies soak up the spiced oil for at least 2 hours.

    The vegan anchovies can be stored in the oil for a few weeks or even up to a few months. Keep them in the fridge.

    Enjoy!

  • Vanilla crescents (Vanillekipferl), wonderful Christmas biscuits

    Vanilla crescents (Vanillekipferl), wonderful Christmas biscuits

    Vanillekipferl, vanilla crescents. The most popular christmas biscuit (cookie) in Gemany and Austria.
    It’s wonderful vanilla fragrance! And the feeling on the tongue when the shortcrust crumbles into your mouth!
    My recipe is deliciously crunchy-tender, like the original. But, of course these Vanillekipferl are vegan!

    Also great to give away in pretty jars or tins! A perfect heart warmer in the holiday season.

    [modula id=”27710″]

    Ingredients for about 30 vanilla crescents:

    Dough:

    250 g flour
    50 g almonds, ground
    50 g hazelnuts, ground
    210 g vegan butter (room temperature)
    80 g of sugar
    1 tbsp vanilla sugar

    To turn in, after baking:

    120 g icing sugar
    2 tbsp vanilla sugar

    Preparation:

    Mix all the ingredients for the dough well together. Then wrap the firm dough in cling film and place it in the fridge for one hour.

    Mix the icing sugar with the vanilla sugar.
    Preheat the oven to 175 ° top and bottom heat.

    Form the dough into a 3-4 cm (1 inch) thick roll and cut it into finger thick slices. From those slices form the biscuits. Tehy should have a little, slightly flat banana shape. Please check the pictures for the correct shape.

    Place the vanilla crescents on a baking tray with baking paper. And bake them for about 20 minutes on a medium rack. Until they start to turn slightly golden brownish.

    Let the vanilla crescents cool for three to five minutes and then turn them in the icing sugar mixture.

    Let them cool completely. After that, they are best kept in a tin can or a closed jar.

    Enjoy your biscuits and merry Christmas!

    In search for more vegan baking recipes?

    Try my German crullers, rhubarb meringue tartelettes or poppy seed streusel cake.

    Or just check out my ‘baking and sweets‘ section. Here on dailyvegan.de. You’ll find many tasty recipes and inspriations there.

  • Cauliflower or broccoli baked in herbal dough on red wine shallots

    Cauliflower or broccoli baked in herbal dough on red wine shallots

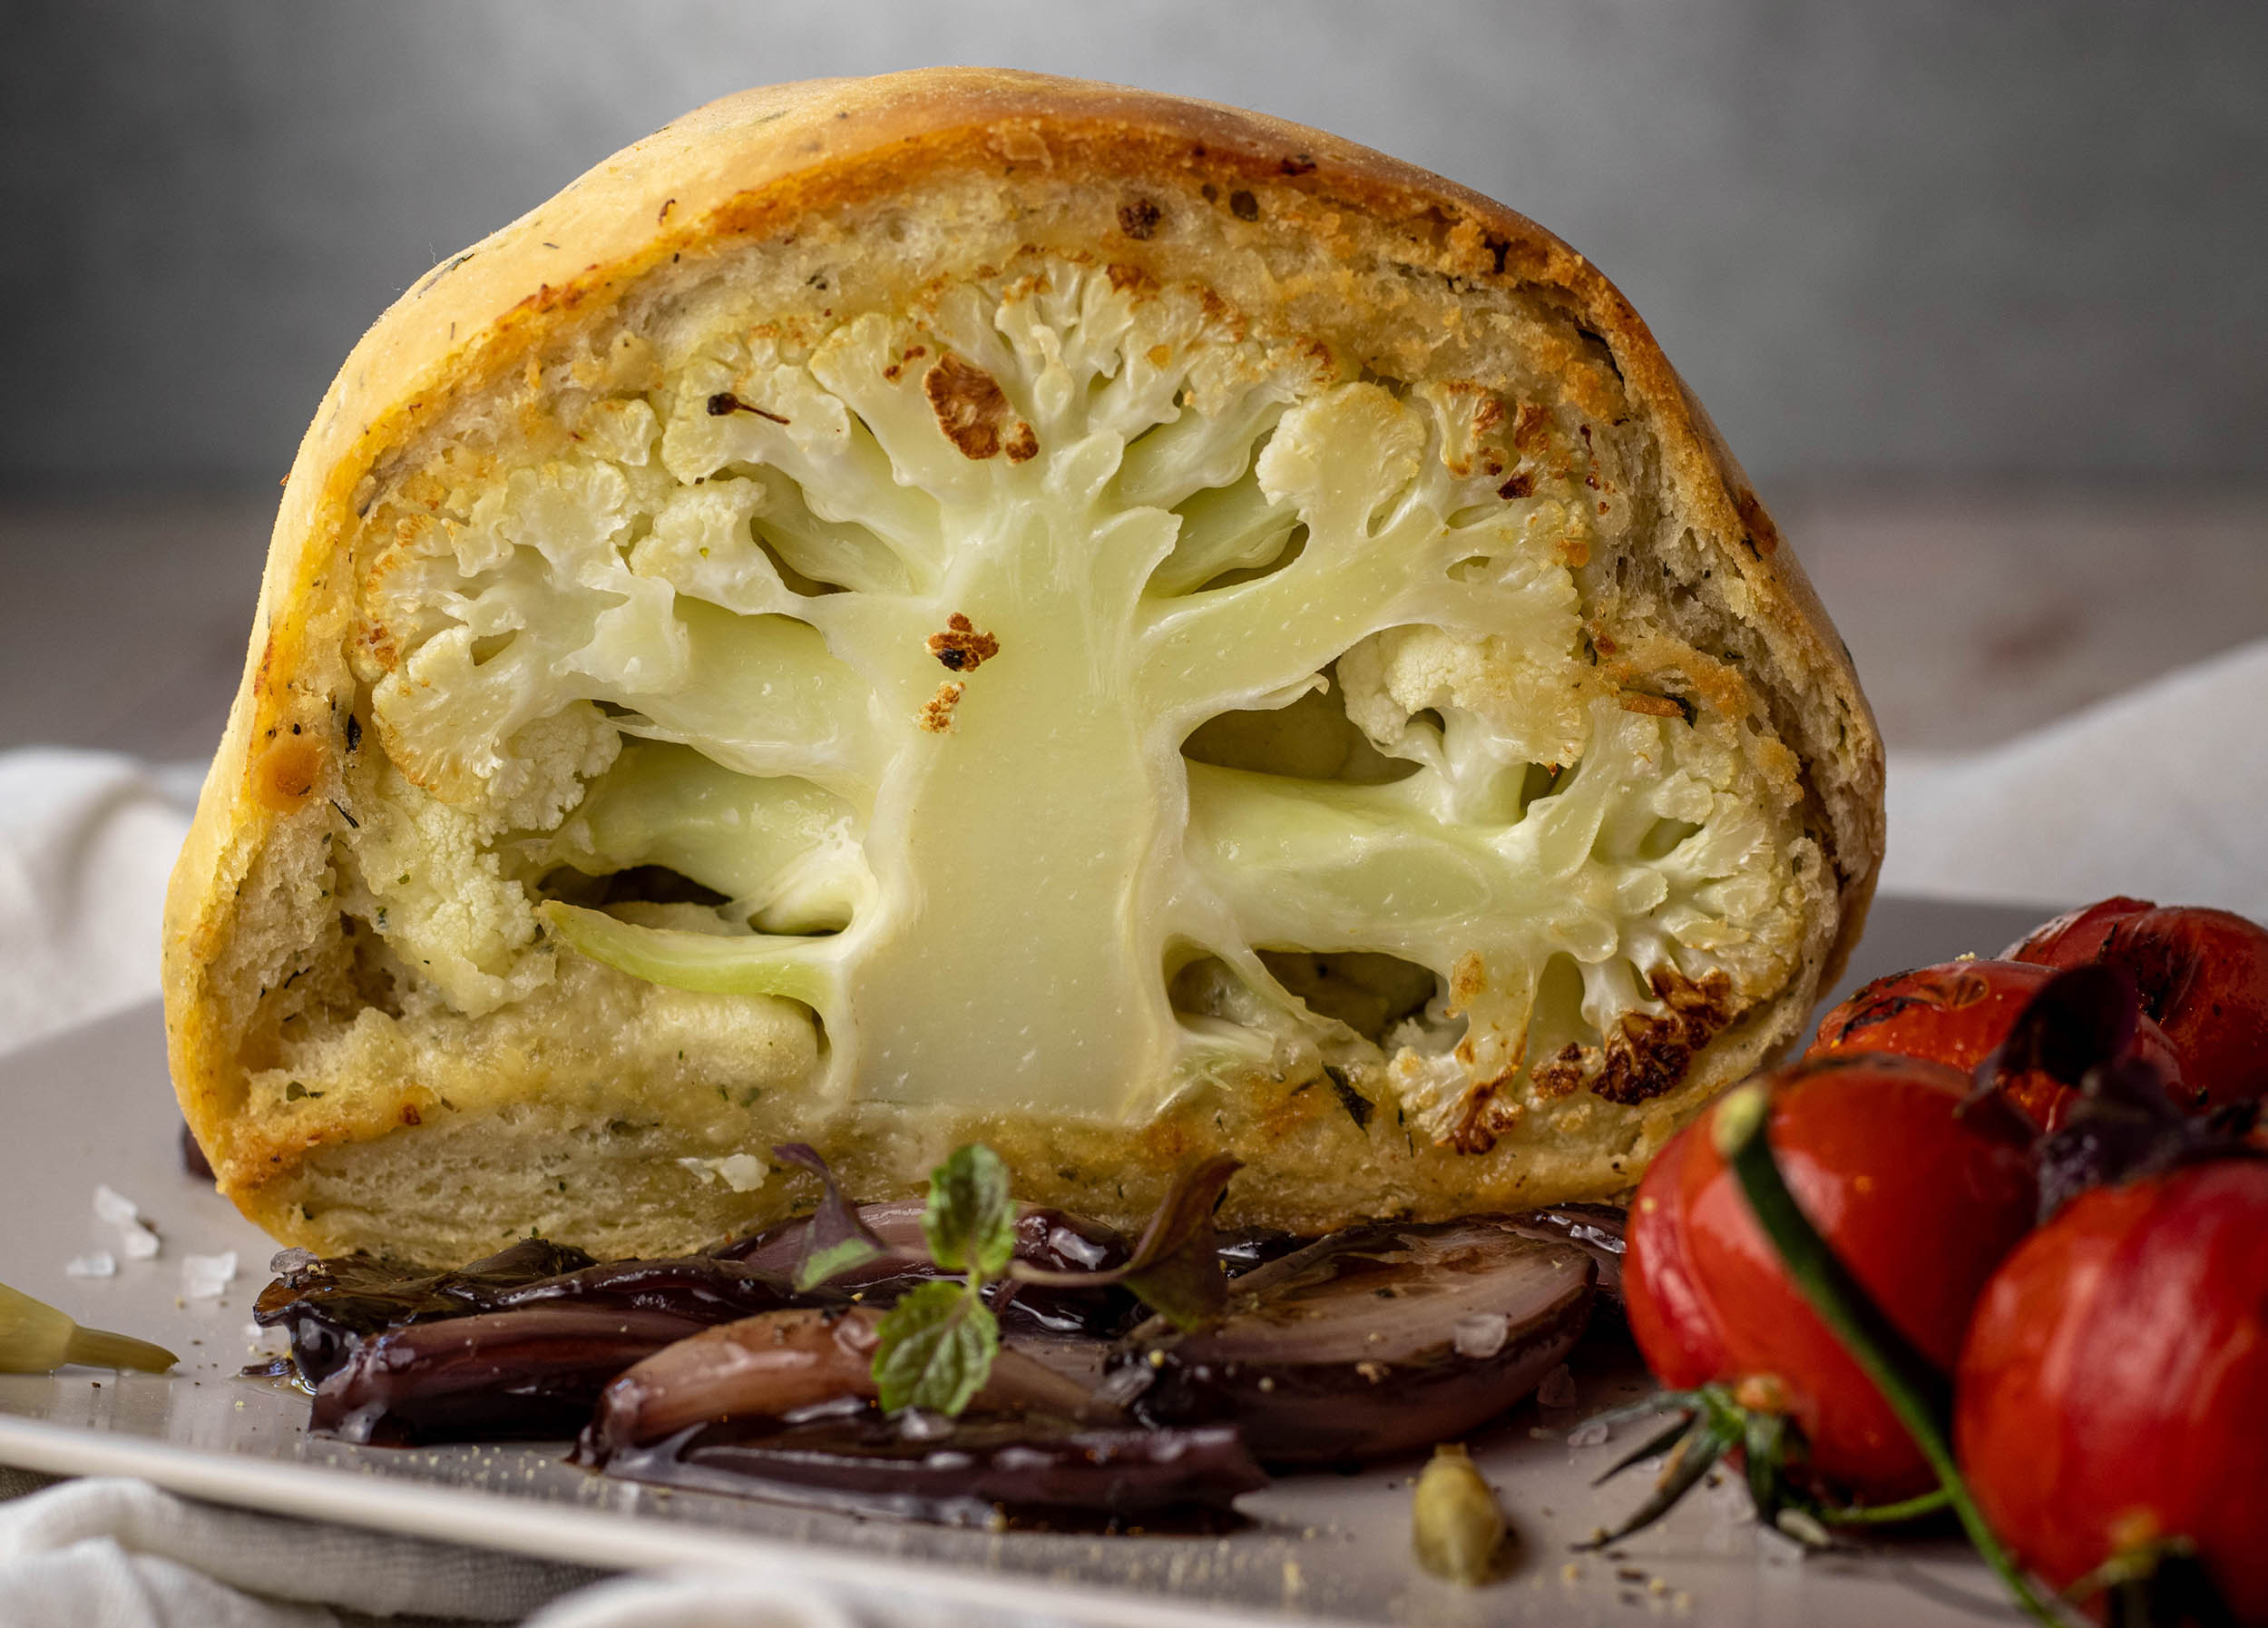
    Small baby cauliflower and broccoli, baked in a spicy, crunchy herbal dough. Then cut in half and roasted with garlic oil.
    Served on juicy, aromatic, slightly sweet, red wine shallots, refined with fresh thyme from the balcony.

    [modula id=”27793″]

    Ingredients for 4 servings:

    Cauliflower and broccoli:

    Dough:

    500 g flour
    1 tbsp vital wheat gluten
    1-2 tsp salt
    20 g of fresh yeast
    1 tsp sugar
    3 tbsp olive oil
    3 tbsp mixed herbs, chopped
    Approximately 250 ml of lukewarm water

    1 baby cauliflower
    1 baby broccoli

    5 tbsp vegetable oil
    1 garlic clove, very finely chopped
    1 tsp salt

    Red wine shallots:

    300 g shallots, peeled and halved
    1 garlic clove, finely chopped
    3 tbsp Alba oil
    2 tbsp brown sugar
    200 ml of red wine, dry
    2 tbsp dark aceto balsamico
    5 stems of thyme
    1 bay leaf
    1 tbsp corn starch, stirred with 1 tbsp of cold water
    salt
    pepper

    Preparation:

    Cauliflower and broccoli baked in yeast dough:

    Dough:

    Mix the flour, vital wheat gluten and salt. The higher protein content in the flour, added by the gluten, helps to create a fluffier dough.
    Crumble the yeast and put it in a bowl with the sugar. Stir in a little lukewarm water and let it rest for 15 minutes.
    The water is lukewarm when it does not feel cold or hot on your fingers. It should have body temperature. Above 40°C (104F) would be too hot for the yeast.
    Add the oil and the yeast to the flour and gradually knead in the lukewarm water until a firm dough is formed. The dough should no longer be brittle, but it also should not stick to the fingers. Knead the dough thoroughly for a few minutes with your hands. This is very important so that the dough rises well.

    Cover the dough with a kitchencloth and let it rest for 1 hour in a warm place. Afterwards knead it again.

    Stir oil, garlic and salt into the dough and let it rest again, for an hour or more.

    Preheat the oven to 170°C (340F) top and bottom heat.

    Devide the dough in two halves and roll it out about 1/2 cm (0.2 inches) thick. Cover the baby cauliflower and baby broccoli with the dough. To do this, put the dough over the cauliflower / broccoli and fold it together on the bottom. Press the folded part tightly together.
    Place on a baking tray with baking paper and bake in the oven on a medium rack for about 30 minutes.

    Turn the oven up to 200°C (390F).
    Cut cauliflower and broccoli in half with a sharp knife. Brush the open side generously with the garlic oil and place it with the open side down on the baking sheet. Bake again for 15 minutes.

    Red wine shallots:

    Heat the Alba oil in a pan. Alba oil has a fantastic buttery taste. If you do not have any in the house, normal vegetable oil will also do. Caramelise the garlic and raw sugar lightly in the hot oil. Add the onions and sauté them.
    Stir in red wine, balsamic vinegar, thyme and bay leaves and simmer for about 10-15 minutes.
    Season with salt and pepper. Stir in the dissolved starch and simmer briefly again until the sauce is thickened.

    Serve the cauliflower and broccoli in the dough on the red wine shallots.

    Enjoy your meal!

    More vegetable recipes?

    Try also my Sopa De Ajo or beetroot apple soup.

  • Crunchy pretzel cupcakes with salty peanut butter

    Crunchy pretzel cupcakes with salty peanut butter

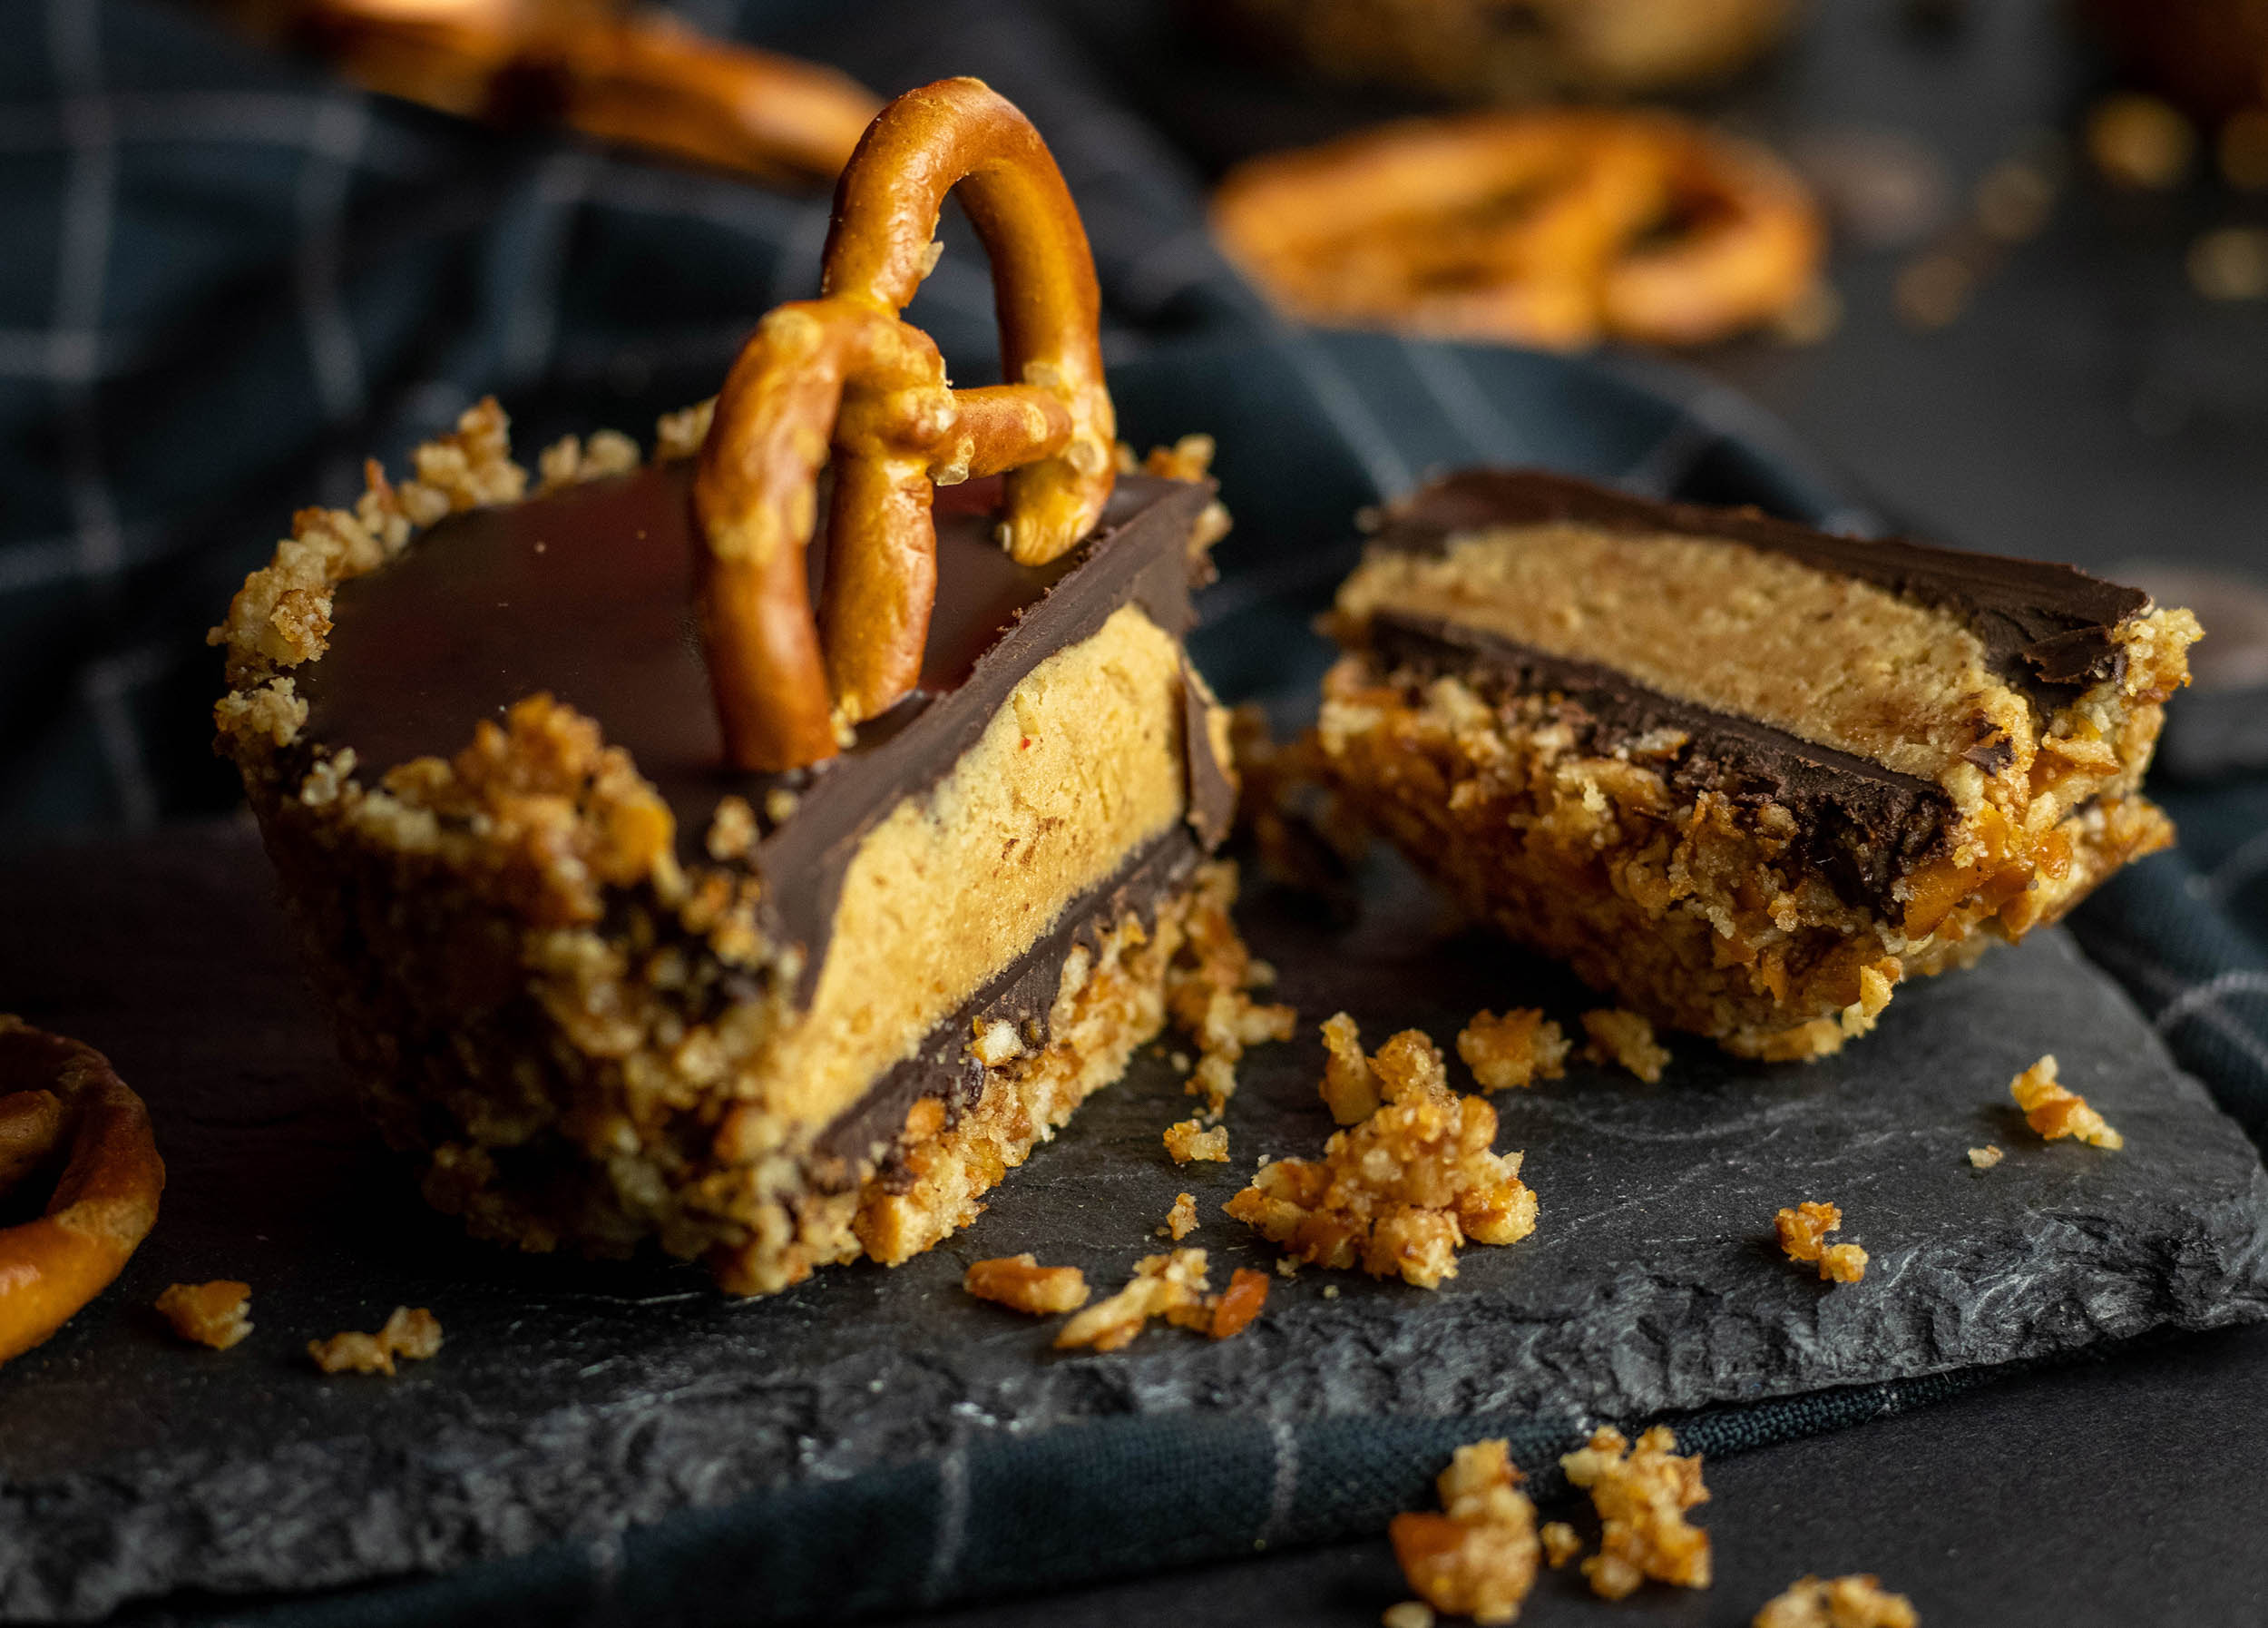
    Drool! Crunchy pretzel cupcakes with salty peanut butter and chocolate.
    A crispy cup made of pretzels. Filled with rich dark chocolate and creamy peanut butter. I added a nice crunch to the pb layer, by mixing it with finely ground oatcakes. The combination of the three elements creates a wonderful explosion of tastes in your mouth. Just brilliant! And you do not even need an oven for making these cupcakes.

    [modula id=”24738″]

    Ingredients for 8 pretzel cupcakes:

    150 g mini pretzels, crumbled
    120 g vegan butter, melted

    80 g vegan oatcakes (oat biscuits, oat cookies), very finely crumbled
    200 g peanut butter (creamy not crunchy)
    1/2 teaspoon salt

    250 g vegan dark chocolate, in pieces

    Mini pretzels for decorating the cupcakes

    Directions:

    Mix the pretzel crumbs with the melted vegan butter. Spread the mixture on 8 muffin cups. Use a small glass to make the pretzel cups. Push the glass into the muffin tray’s cups and twist and turn it, until the shape is as desired.
    Allow to cool for 15 minutes in the refrigerator.

    While the pretzel cups rest in the fridge, melt 100 g of the dark chocolate over boiling water. Let the melted chocolate cool for a few minutes. Add the chocolate to the pretzel cupcakes. Use about 2 teaspoons per cupcake.
    Allow to cool for 30 minutes in the fridge.

    Heat up the peanut butter in a saucepan. But do not bring it to a boil. It is just supposed to melt. Stir in the salt and the finely ground oatcakes. Spread the peanut butter mix onto the cupcakes. Using about 3 teaspoons per cupcake.
    Allow to cool for 1 hour in the refrigerator.

    Melt the remaining 150 g of chocolate over boiling water. Allow to cool for a few minutes. Spread it evenly on the pretzel cupcakes and decorate them with pretzel pieces or whole pretzels.
    Let the cupcakes cool again in the fridge for at least 30 minutes.

    Enjoy!

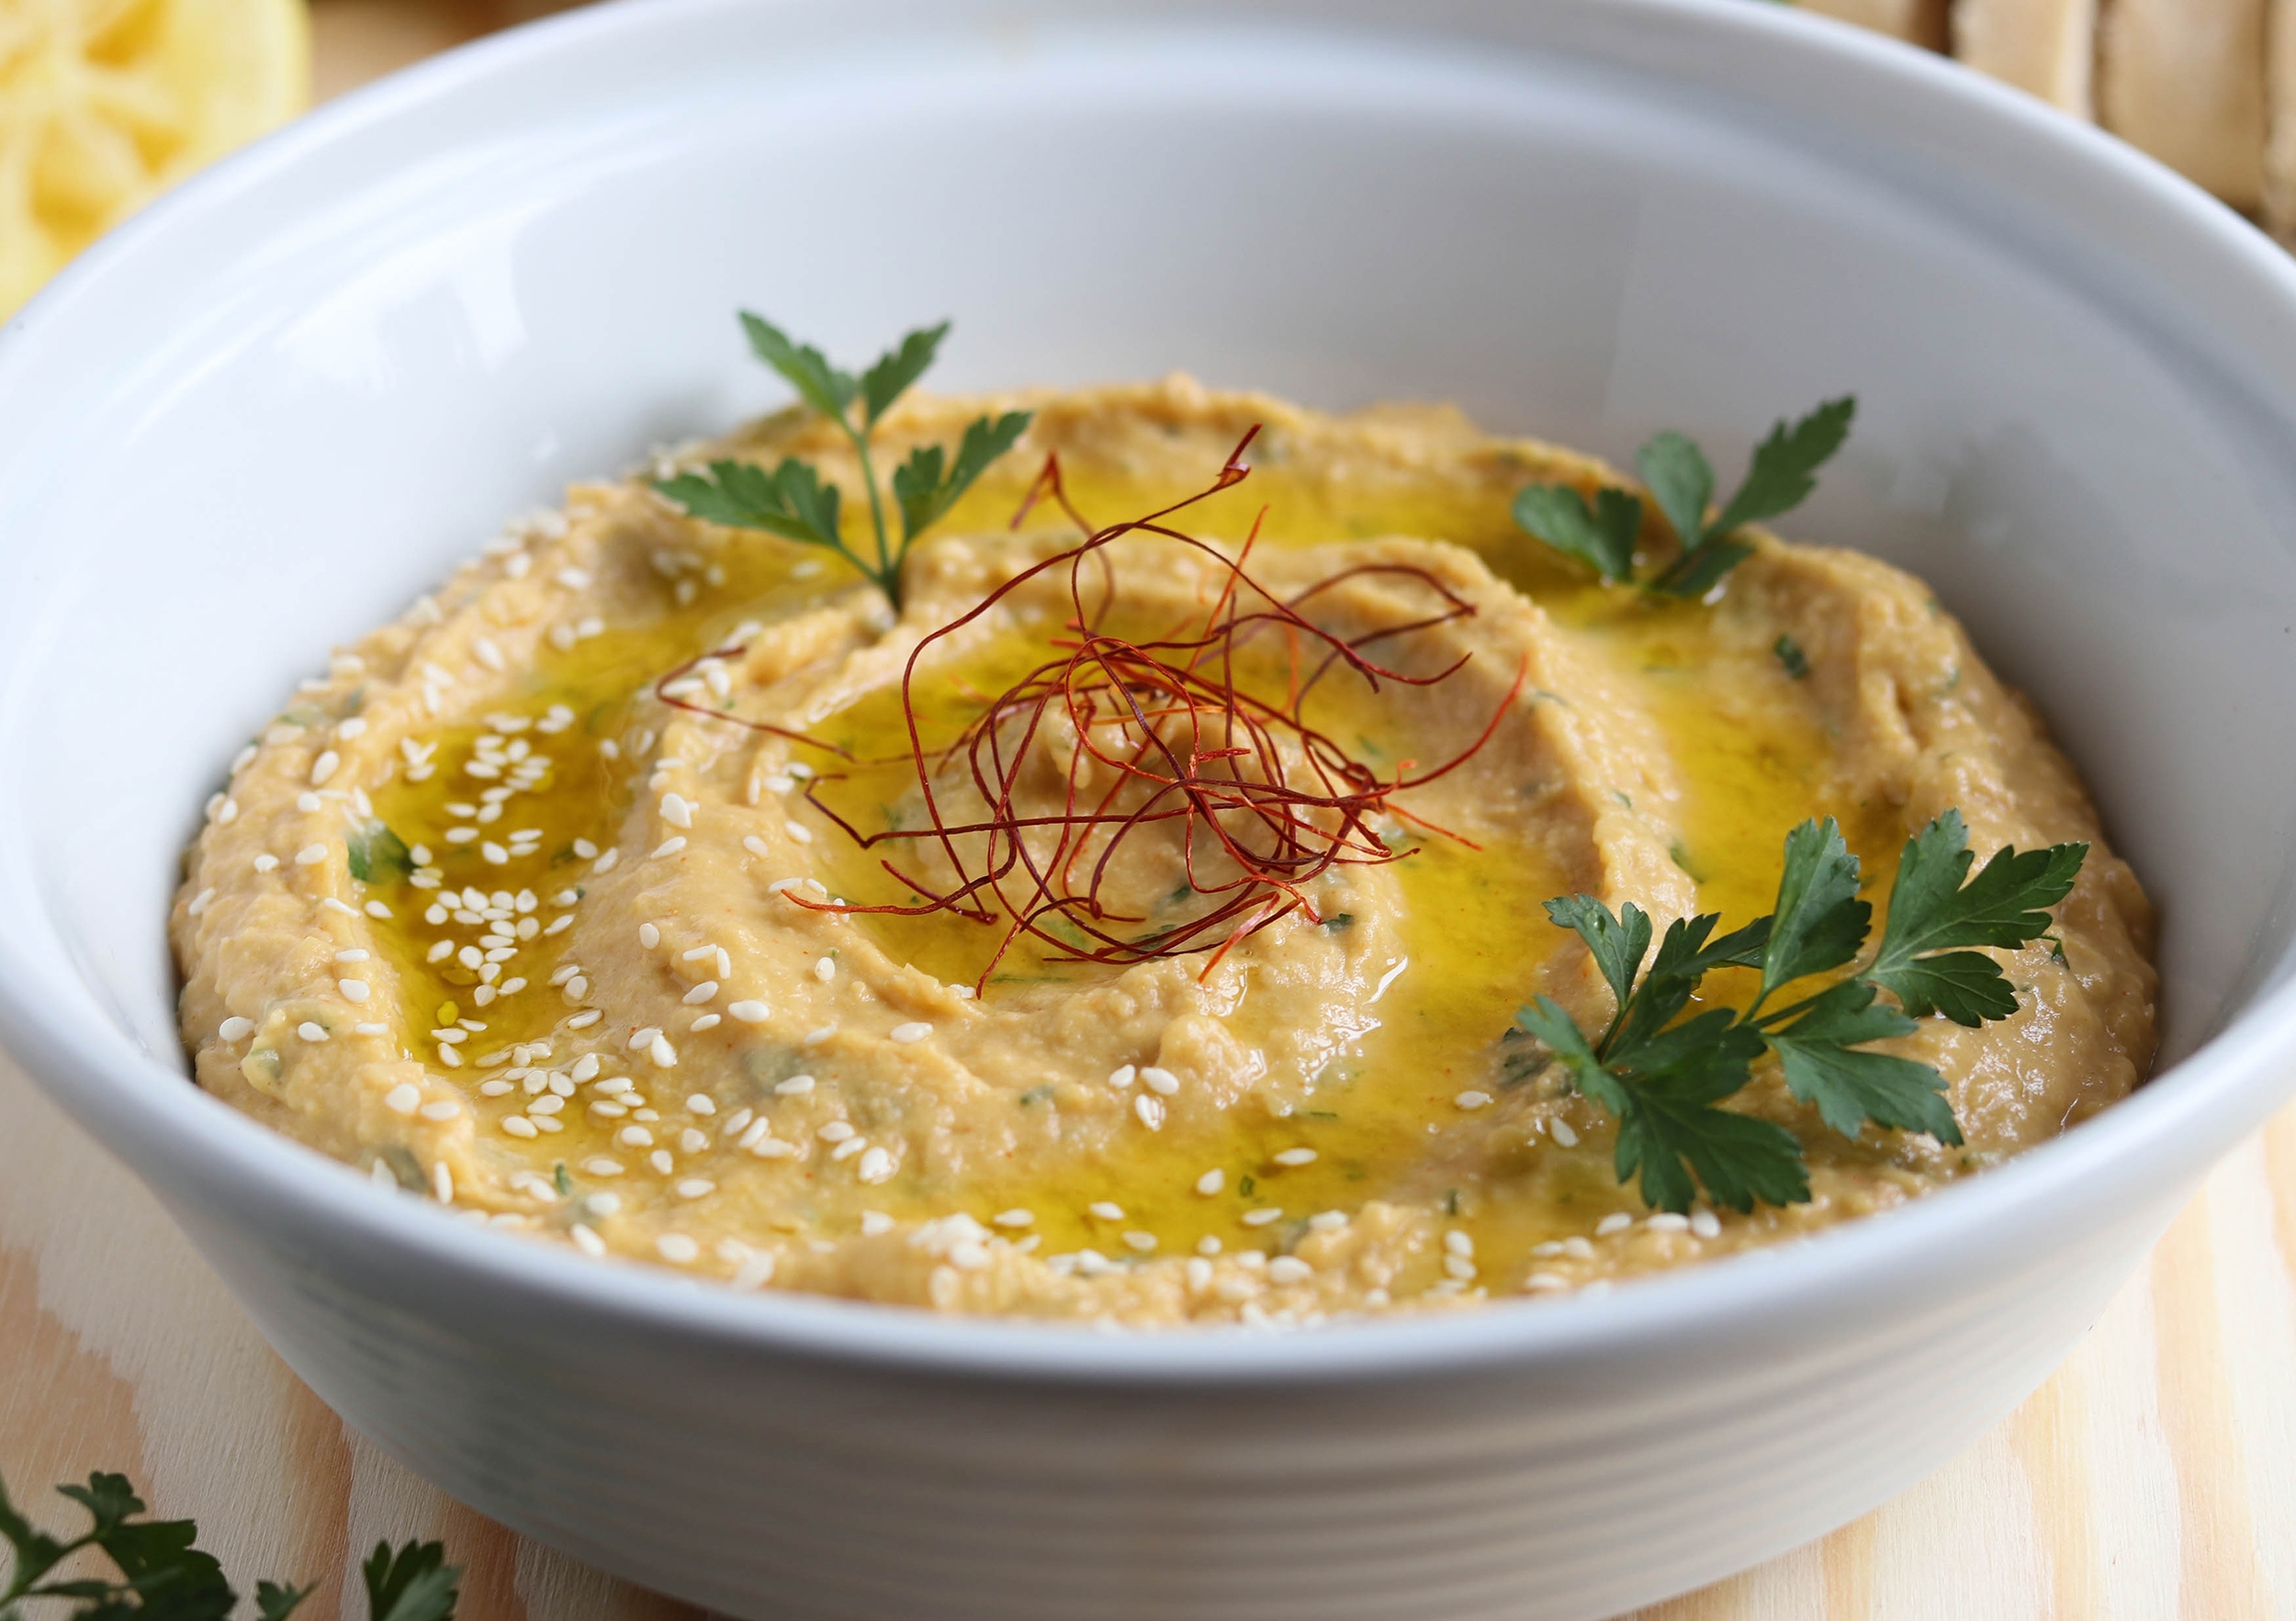
  • Hummus  – creamy and full-bodied flavoured

    Hummus – creamy and full-bodied flavoured

    Hummus! is there anybody who does not love Hummus? The oriental speciality made from chickpeas, tahini (sesame paste), olive oil and lemon juice.

    It is mostly eaten in Lebanon, Syria and Isreal. Often as a starter, always with bread. Hummus fits in just wonderful on any buffet. It is very tasty with falafel, fried or baked vegetables and other dishes.
    All hummus recipes vary a bit. I add a bit of paprika and parsley to mine.

    [modula id=”24103″]

    Ingredients for about 300 ml Hummus:

    250 g chick peas (can, glass or pre-cooked), rinsed
    10 tbsp olive oil
    3 tbsp tahini (sesame paste)
    juice of 1 lemon
    2 cloves of garlic, roughly cut
    1 tsp paprika
    1 pinch of cumin
    1 tsp salt
    2 tbsp parsley, chopped

    optional: parsley and olive oil for garnish.

    Directions:

    Use a blender to mix all ingredients, except for the parsley, to a smooth purée. The Hummus should not contain any chickpea pieces any more and it should be soft and creamy.
    Stir in the parsley.
    Serve in a nice bowl and garnish with olive oil and parsley. If you like, you can also sprinkle some roasted sesame or sumak on top of it.

    The hummus stays fresh in the fridge for a few days, when kept in an airtight container.

    Tips:

    – Replace some of the olive oil with chilli oil and add some chilli flakes to make a hot and spicy chilli hummus. Or you can mix the hummus with small dried tomato pieces. It is also very tasty with freshly chopped mint leaves.
    – Keep the can water from the chick pea can and use it as Aquafaba. You can use it as egg whites for vegan meringues, pavlovas, mousse au chocolat or as the meringue topping on lemon meringue pies.

    More vegan recepis, that go well with bread?

    Try my meatball sandwich, with homemade subway bread, smoked bacon, made from seitan or delicious egg salad for sandwiches.

  • Yellow Smoothie – fresher and tastier than money can buy

    Yellow Smoothie – fresher and tastier than money can buy

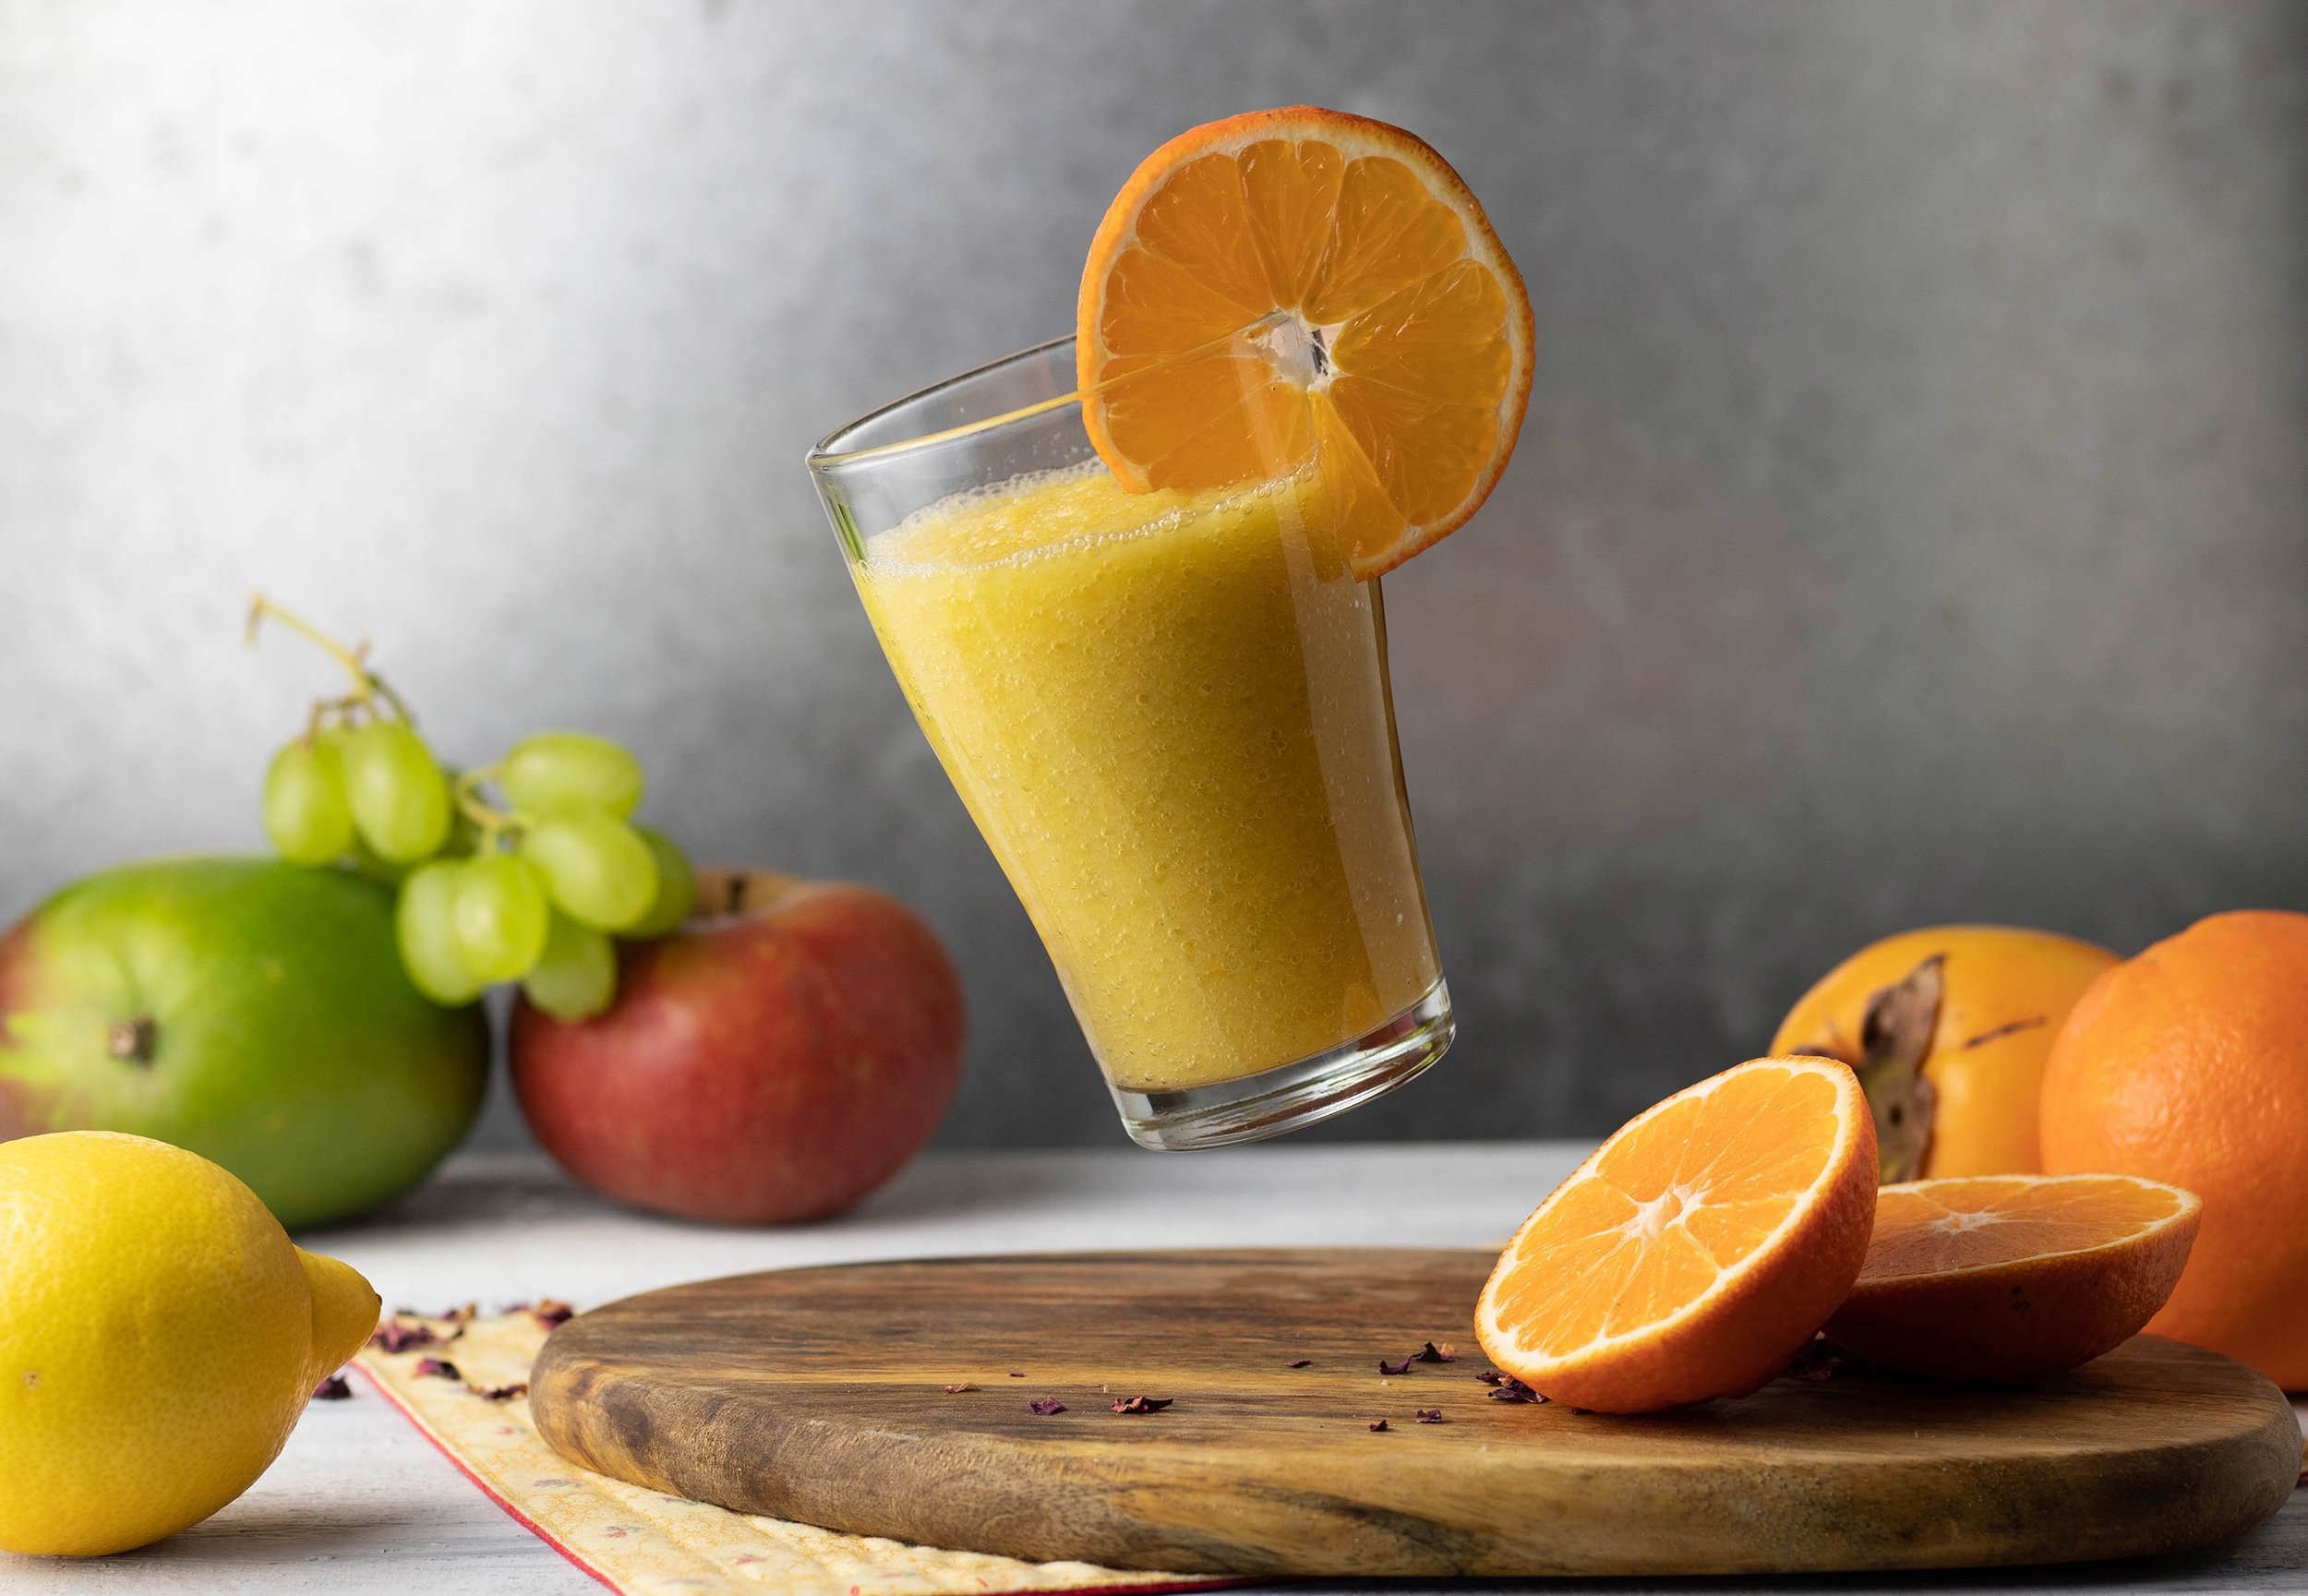
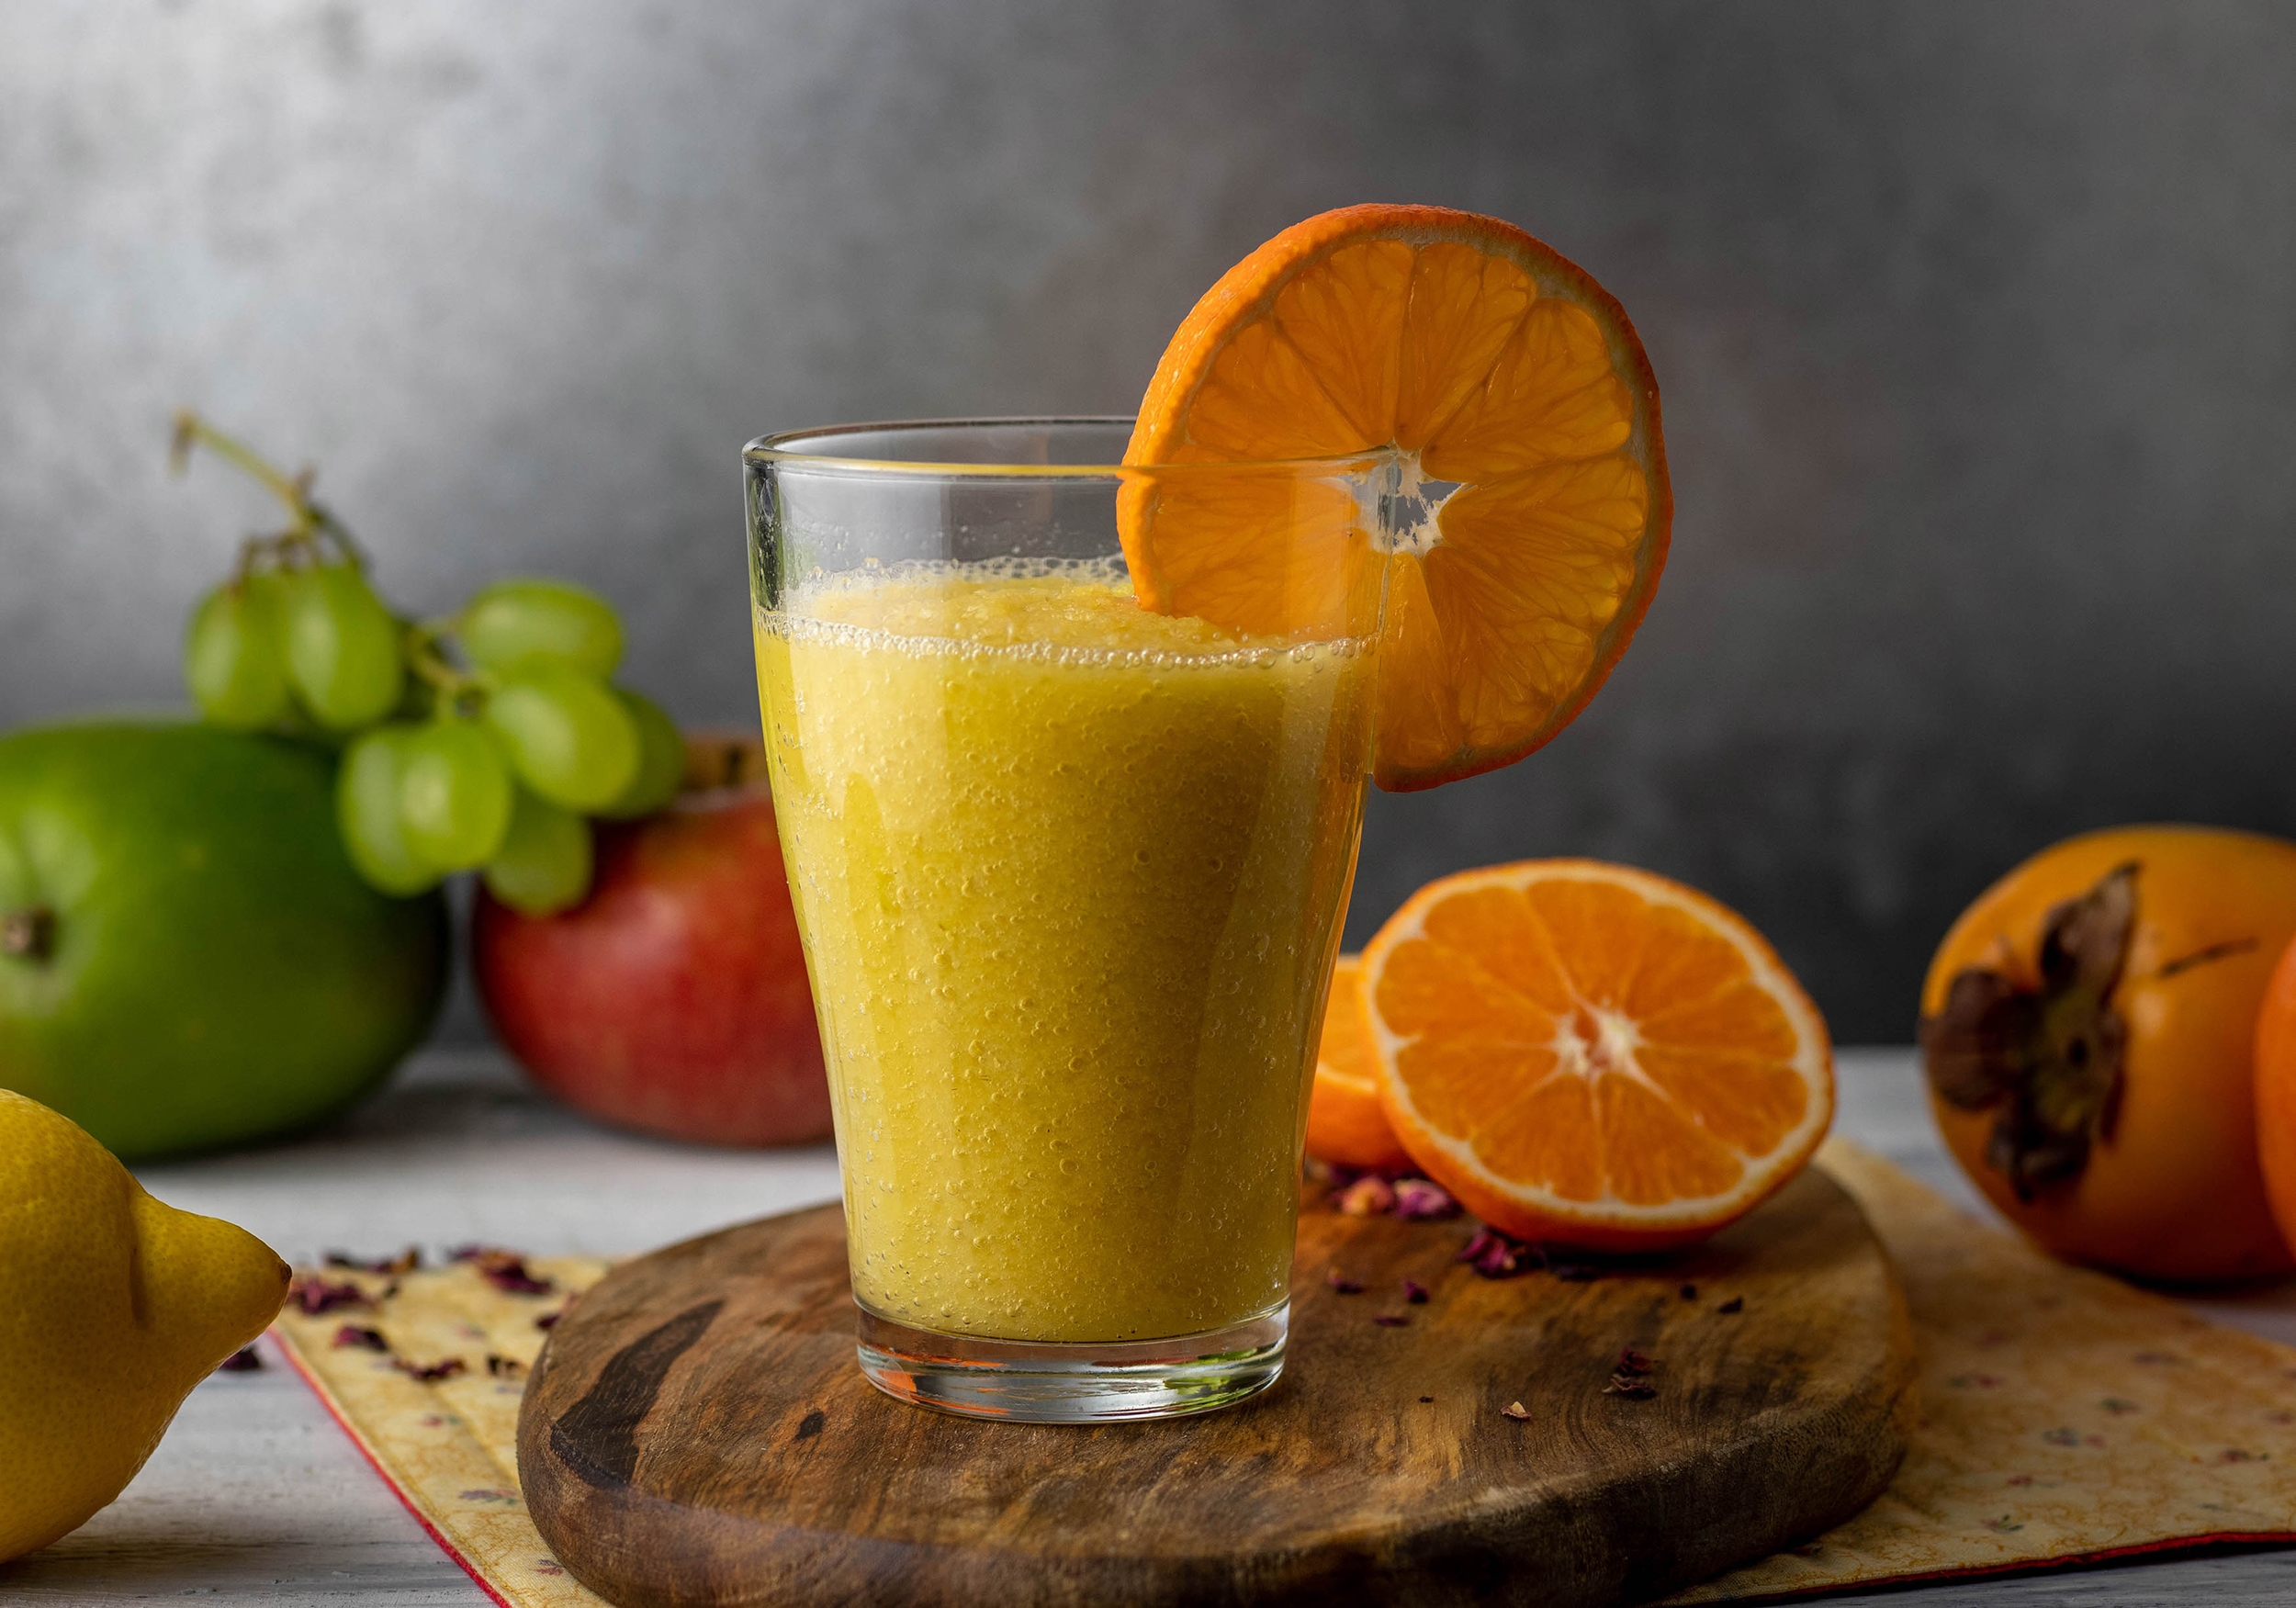
    My yellow smoothie is packed with vitamins. Perfect for a wet and cold autumn or in wintertime.
    Quickly prepared in just a few minutes, much cheaper and fresher than bought smoothies from the supermarkets!

    My yellow smoothie is packed with vitamins.
    My yellow smoothie is packed with vitamins.

    Yellow smoothie made from fruits

    In this smoothie, I only use fruits and no vegetables. For taste and color reasons I am blending mango, apple, persimmon, lemon, orange, tangerine and grapes. So you’re getting a bright yellow smoothie, that is very rich in taste.

    Yellow smoothie made from fruits
    Yellow smoothie made from fruits

    Are you looking for more easy, vegan recipes?

    Then you should try out these recipes I created, right here on Daily Vegan. Quick and easy to prepare:

    In this smoothie, I only use fruits and no vegetables.
    In this smoothie, I only use fruits and no vegetables.

    Show me your yellow smoothie

    Feel free to follow me on Instagram or Facebook. And I’ll be delighted if you make my smoothie and post a photo of it. It’s best if you tag my account in it too. Because I always find it really great and exciting to see how my recipes are prepared in other kitchens!

    Quickly prepared in just a few minutes, much cheaper and fresher than bought smoothies from the supermarkets!
    Quickly prepared in just a few minutes, much cheaper and fresher than bought smoothies from the supermarkets!

    Ingredients for 4 x yellow smoothie:

    1 mango, peeled and cut into pieces
    1 persimmon, peeled and cut into pieces
    2 oranges, the juice
    1 lemon, the juice
    1 tangerine, the juice
    30 green grapes, without seeds
    1 apple, peeled and cut into pieces

    Directions:

    1. Mix all ingredients with a blender, until they’ve turned into a nice and smooth juice.

    Filled into air tight bottles you can refrigerate the smoothies up to 2 or 3 days.

    That was easy!

    Enjoy!